• Nav Social Menu

    • Facebook
    • Instagram
    • Pinterest
    • YouTube

Birdsnest Designs | Denise Cox

  • Home
  • Blog
  • Tutorial Store
    • Creatively Hatched
    • A la Carte Classes
    • Handmade@Home
    • Monthly Card Classes
    • Scrapbook Layouts
  • Shop
    • Shopping & Loyalty Rewards
    • Full Online Store
    • Online Exclusives & Kits
    • New Products
    • Product Suites
    • Paper Pumpkin Past Kits
    • Clearance Rack
  • Join My Team
    • Ready to Join
    • Find Out More
  • Clubs & Classes
  • Catalogues
  • Contact Me

If Friends Were Pretty Pumpkins…

September 6, 2021

6 Sep
If Friends Were Pretty Pumpkins… via @denise34

Happy Monday … Monday’s are always better when they are a holiday, wouldn’t you agree! My posts this week will be featuring one of the new Fall themed stamp sets Pretty Pumpkins along with the coordinating Detailed Pumpkin dies. Both of these products can be found in the August – December Mini catalogue on page 48.

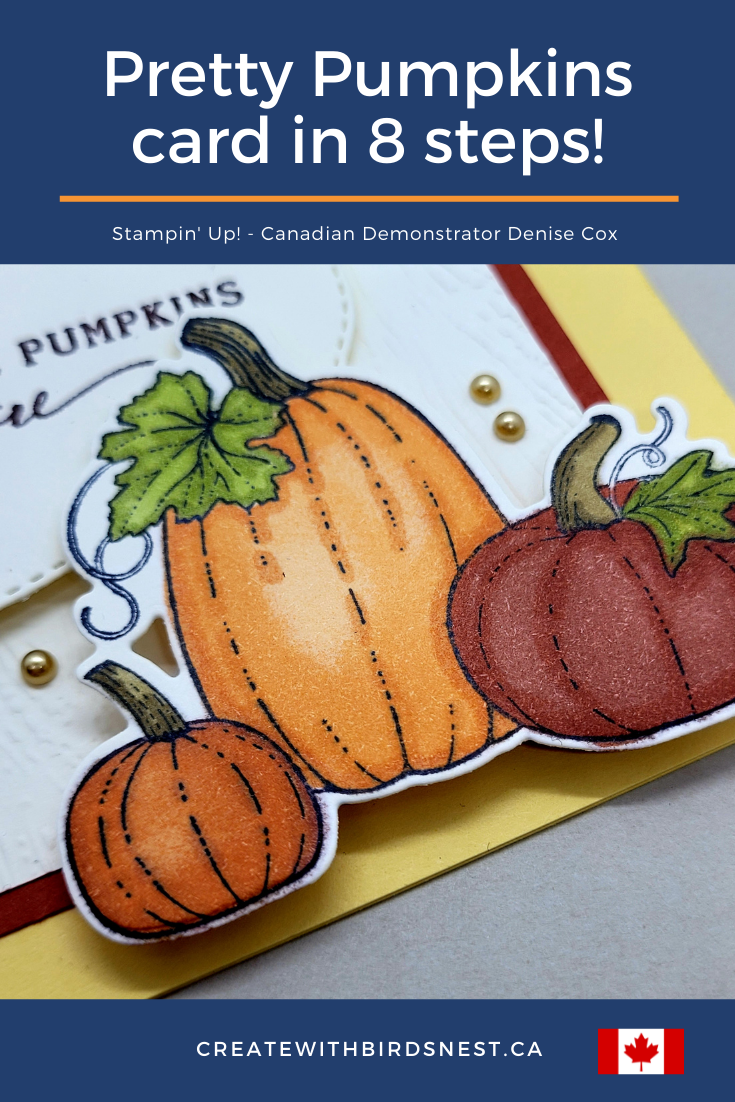
The first card of the week is one that I designed around this beautiful sentiment stamp … If Friends were pumpkins I’d pick you! I love that so much ?

This card incorporates a few additional Stampin’ Up! products which I think tie in nicely with the Fall/Pretty Pumpkin theme.

Tasteful Labels Dies
Timber 3 D Embossing Folder
Simply Elegant Trim
Simply Elegant Trim
Metallic Pearls
Metallic Pearls

There are a number of elements a pieces on today’s card but when you break it all down this card is a snap to create.

So … let me walk you through how easy this lovely card is to make.

  1. The first thing we need to start with is the card base. I have used So Saffron cardstock cut to 8-1/2″ x 5-1/2″ scored in half on the long side at 4.25″
  2. The next layer is Cajun Craze cardstock cut to 4-3/4″ x 3-1/2″ and then Very Vanilla at 4-1/2″ x 3-1/4″ and embossed with the Timber 3D Embossing Folder. Adhere these two pieces together and center on the card front.
  3. On a small scrap piece of Very Vanilla cardstock stamp the sentiment with Early Espresso ink, then run it through the Stampin’ Cut & Emboss machine using the shown label from the Tasteful Labels die set.
  4. Take a 18″ piece of the gold Simply Elegant Trim and loop it up to place behind the die cut label. My trick for this is to have the trim the way I like it on my card and then use dimensionals on top to hold it in place where the label will cover them up. Then you can peel the backing off the dimensionals and use them to adhere your label!
  5. Stamp the image of the three pumpkins onto another scrap piece of Very Vanilla cardstock using Tuxedo Black Memento ink. Next cut them out using the coordinating Detailed Pumpkin dies.
  6. Colour in the images with Stampin’ Blends. I used: Old Olive, Soft Suede, Pumpkin Pie and Cajun Craze. You can use the Color Lifter to add a few additional highlights if you want too!
  7. With double-stacked dimensionals on the bottom edge of the pumpkins and a single dimensional on the top adhere them to the card so that the top overlaps the label. This will create a nice dimension on your card!
  8. Finally to finish off the card add three gold Metallic Pearls around your pretty pumpkins.

Today’s card would be a great card-sketch to keep in mind for future designs. By simply switching stamped images, colours and embellishments you can make the same general layout look completely different! Keep this in mind the next time you create a project that you fall in love with!

I hope that you have enjoyed this post today! Pop back on Wednesday to see another project featuring the Pretty Pumpkins Bundle!

Ordering & Current Promotions

If you are interested in purchasing any of the Stampin’ Up! products that I used in this project that I shared with you today the entire list is shown below. You can jump directly to the item in my online store by clicking on its image from the list.

Remember that the Sale-a-Bration promotion is happening until the end of September. Spend $60 0r $120 and receive a FREE item from the Sale-a-Bration brochure. PLUS for the month of September anyone that places a minimum $60 order using my September Host code BYTNBBNV will also receive a thank you gift from me … a FREE Expressions In Ink Ephemera Pack ($9.50 retail value). These gifts will be mailed out in the beginning of October.

Thanks for popping by today! I hope you enjoy the rest of your Labour Day Long Weekend … Be sure to check back in on Wednesday.

Product List
Pretty Pumpkins Bundle
$62.00
Tasteful Labels Dies
$42.00
Timber 3 D Embossing Folder
$13.50
Simply Elegant Trim
Simply Elegant Trim
$10.25
Metallic Pearls
Metallic Pearls
$9.50
Early Espresso Classic Stampin' Pad
$10.25
Tuxedo Black Memento Ink Pad
$8.25
Old Olive Stampin' Blends Combo Pack
$12.00
Soft Suede Stampin' Blends Combo Pack
$12.00
Pumpkin Pie Stampin' Blends Combo Pack
$12.00
Cajun Craze Stampin' Blends Combo Pack
$12.00
Stampin' Blends Color Lifter
$6.00
So Saffron 8-1/2" X 11" Cardstock
$12.00
Cajun Craze 8-1/2" X 11" Cardstock
$12.00
Very Vanilla 8-1/2" X 11" Cardstock
$13.25
Stampin' Dimensionals
$5.50
Stampin' Seal
Stampin' Seal
$11.00
Stampin' Cut & Emboss Machine
$163.00
Paper Trimmer
Paper Trimmer
$34.00

Love this post? Please share!

Share
Pin43
Tweet
Email


Filed Under: Cards, Project Gallery Tagged With: Cardmaking, Cards, Pretty Pumpkins

Previous Post: « Happy Day! It’s Friday ❤
Next Post: Haunts & Harvest: Paper Pumpkin Kit! »

Reader Interactions

Comments

  1. Christine Bartsoff says

    September 6, 2021 at 10:15 pm

    Great sentiment & colours! Simple but perfect!

Primary Sidebar

Meet Denise

Hi there, I am Denise Cox, I live in British Columbia, Canada. I am married to my husband Brandon, we have two grown sons and two very busy, but adorable, fur-babies. I love papercrafts and was introduced to Stampin' Up! back in 2009. After a year of falling in love with the products I purchased my starter kit. My journey has been an incredibly rewarding experience, it lets me be creative every day and inspire others to do the same.

  • Facebook
  • Instagram
  • Pinterest
  • YouTube

Purchase My PDF Tutorials!


H2F377CC

Join in the fun
and let's get crafty!

Introducing the October Kit!

Available Online Only!

Sign up to receive my newsletter, blog posts, or both, delivered right to your inbox! Each contains creative inspiration, all the latest news and promotions.

Thank you!

Check your inbox for further instructions.

.

Purchase My PDF Tutorials!

Footer

Important Links

  • Home
  • Blog
  • Shop
  • Buy the Starter Kit
  • Contact Me
  • About Me
  • Privacy Policy

  • Facebook
  • Instagram
  • Pinterest
  • YouTube

Sign up to receive my newsletter, blog posts, or both, delivered right to your inbox! Each contains creative inspiration, all the latest news and promotions.

Thank you!

Check your inbox for further instructions.

.
All content on this blog is the property of Denise Cox, Stampin' Up!® Independent Demonstrator. Classes, services and projects offered here are not endorsed by Stampin' Up!® Projects, videos, photos, ideas and articles are shared for personal use only and may not be removed, duplicated or copied without permission

Copyright © 2023 Denise Cox & Birdsnest Designs · Theme Customisation by Catherine Carroll · Privacy Policy

43