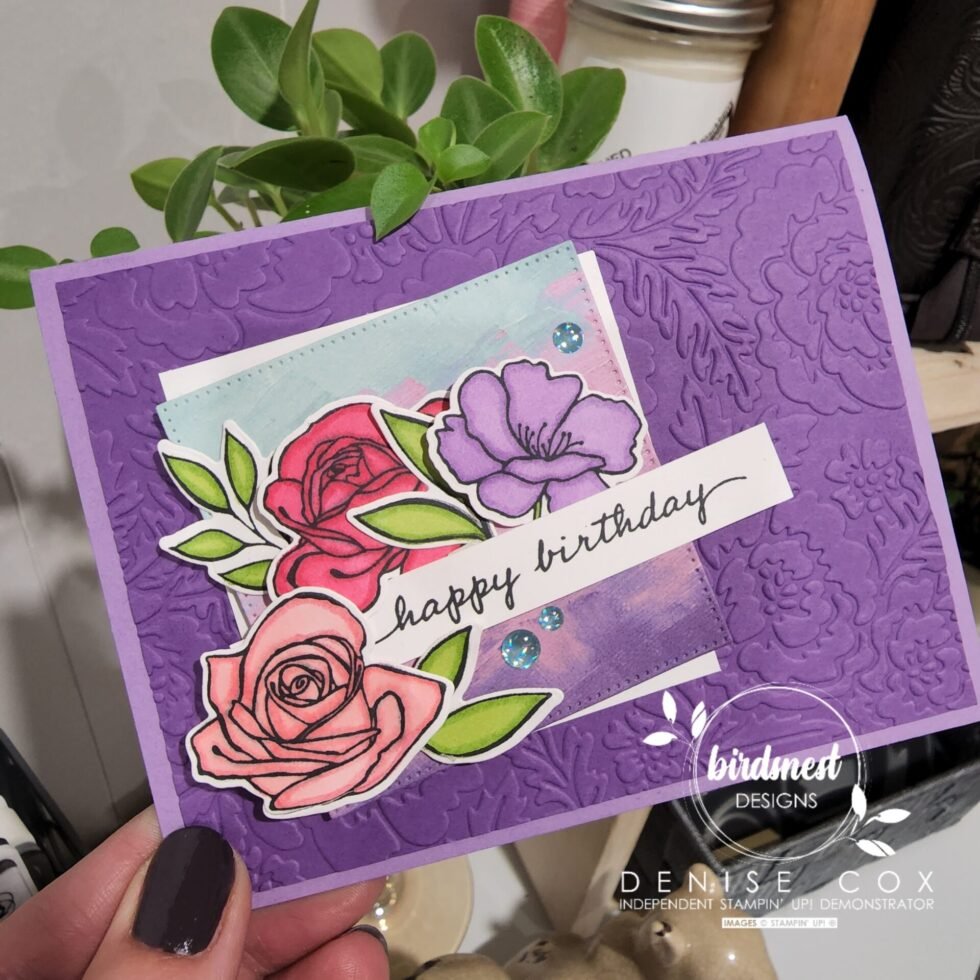
Beautiful Birthday Card with Happiness Abounds

This week just flew by, I can’t believe it is already Friday! Today’s card is a fun, floral birthday card that I created using the Happiness Abounds bundle. I think this may just be my new favourite flowery stamp set … if you haven’t already be sure to check this Hues of Happiness Suite out .. it’s gorgeous!
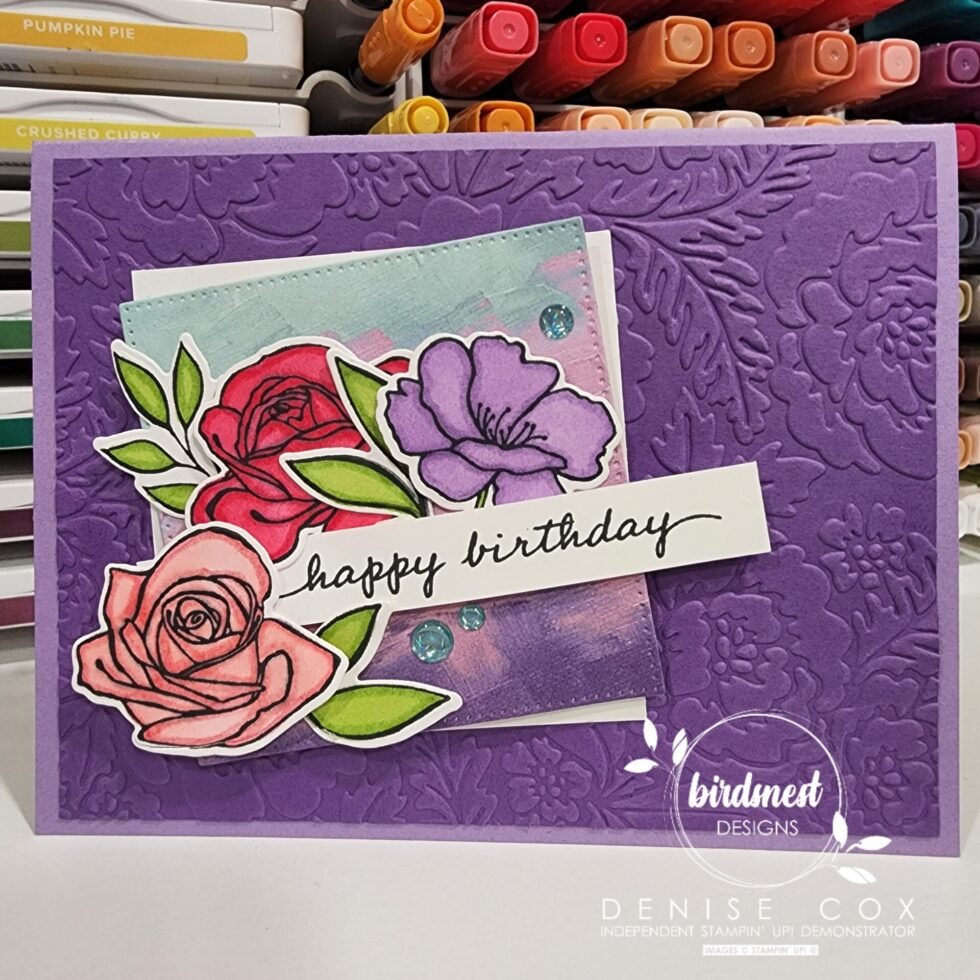
This birthday card is full of fun & fabulous flowers and I am excited to be sharing it with you! I am so happy with how it came together. I’ve included the step-by-step instructions if you want to recreate this Happiness Abounds birthday card too. Be sure to leave a comment below … I love hearing from you ❤
There is just under two weeks left take advantage of the Stampin’ Up! Sale-A-Bration promotion… you get to choose Free product for every $60 you spend. Now is a great time to think ahead to your holiday crafting and to stock up on your most loved supplies.. All Sale-A-Bration exclusive products are while supplies last so don’t wait too long to place your order!
Thanks for stopping by today … have a crafty, relaxing weekend & happy stamping!

Let’s Make It!
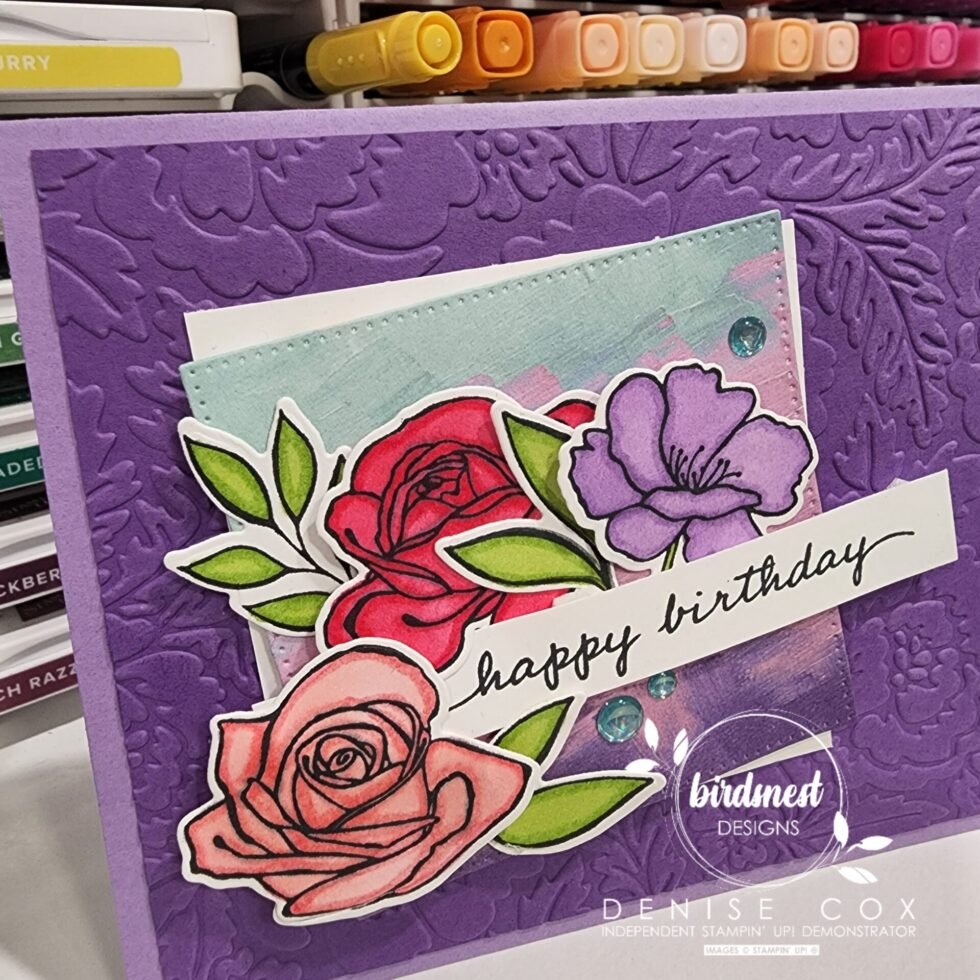
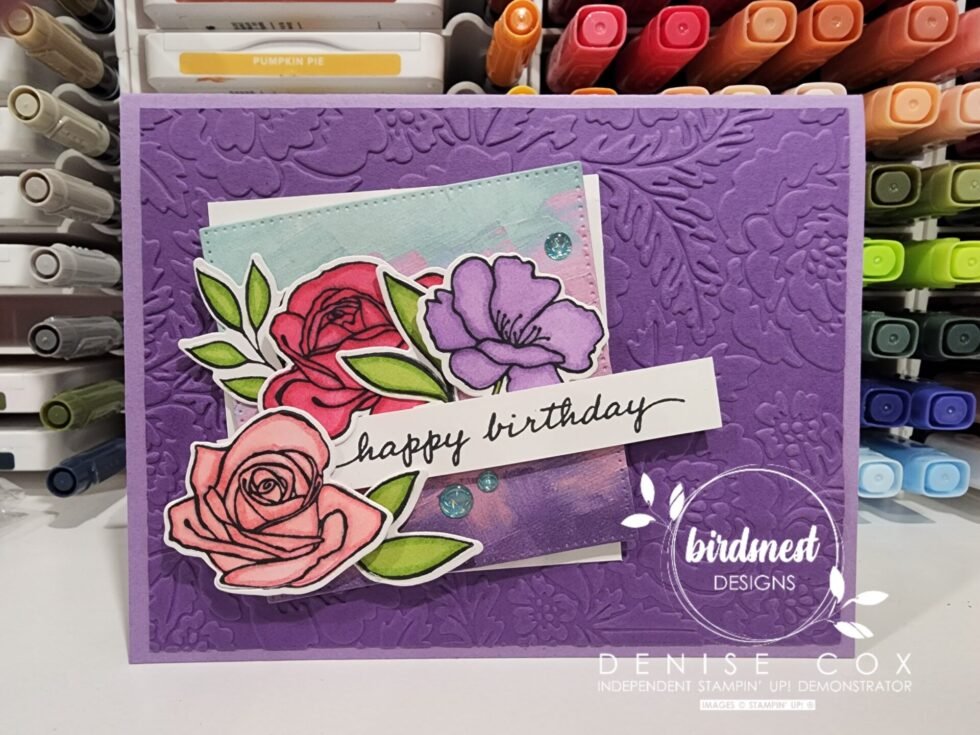
- Start with a Highland Heather card base 8-1/2″ x 5-1/2″ then score on the long edge at 4-1/4″ and fold to create your landscape card
- Next emboss a 4″ x 5-1/4″ piece of Gorgeous Grape cardstock with the Pretty Flowers embossing folder and adhere to the card front
- Then attach a 2-7/8″ sqaure piece of Basic White ona slight angle on the left side of the card front
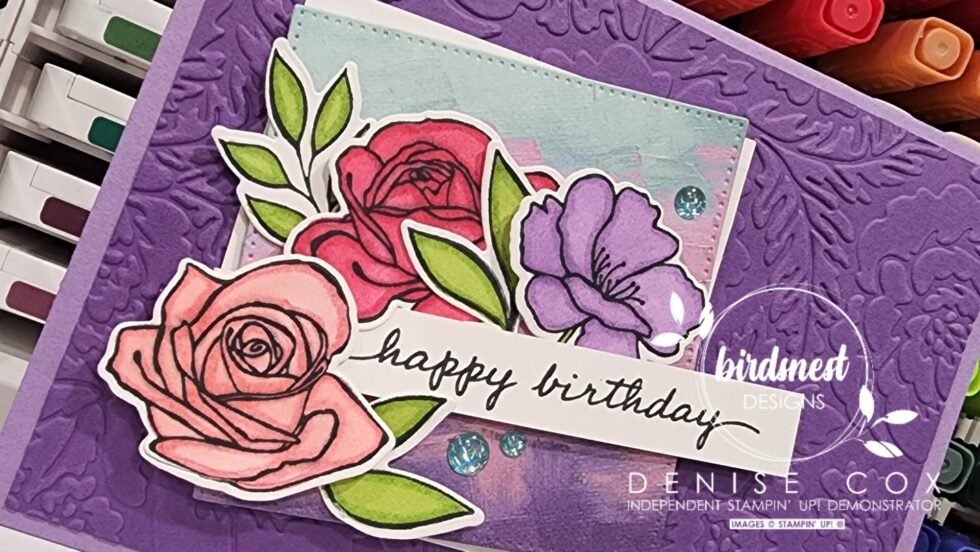
- Using the Stylish Shapes dies cut a 2-3/4″ sticthed square from a piece of Hues of Happiness designer series paper, adhere the die cut over top of the white square using stampin’ dimensionals
- Using Tuxedo Black Memento ink stamp the three flowers and leaves from the Happiness Abounds stamp set on to Basic White cardstock and die cut with the Blossoming Happiness dies
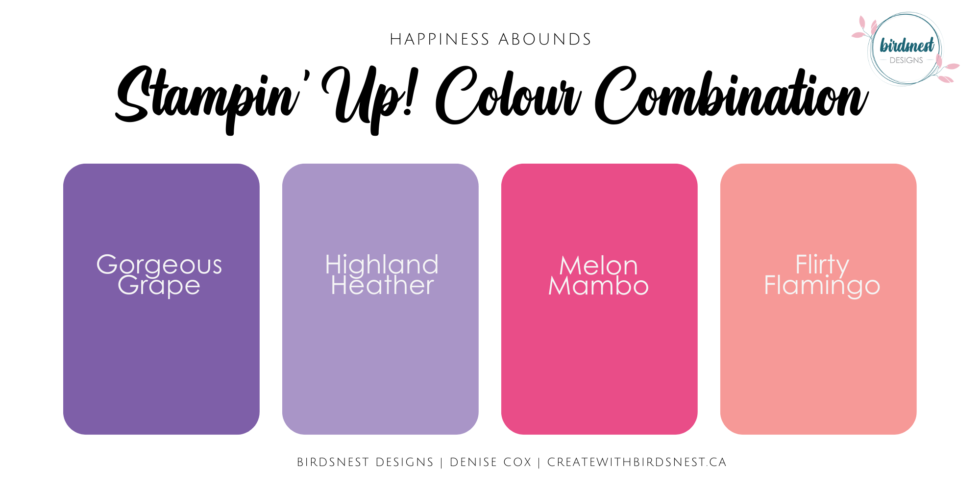
- Colour the images using Stampin’ Blends … Flirty Flamingo, Melon Mambo, Highland Heather and Granny Apple Green
- Assemble the die cuts on the DSP square adhering in place with stampin’ dimensionals
- Stamp happy birthday with black ink on to a 1/2″ x 3″ strip of Basic White cardstock and tuck the left edge in amongst the flowers
- Complete the card by adding three pretty blue dots from the Glossy Dots Assortments
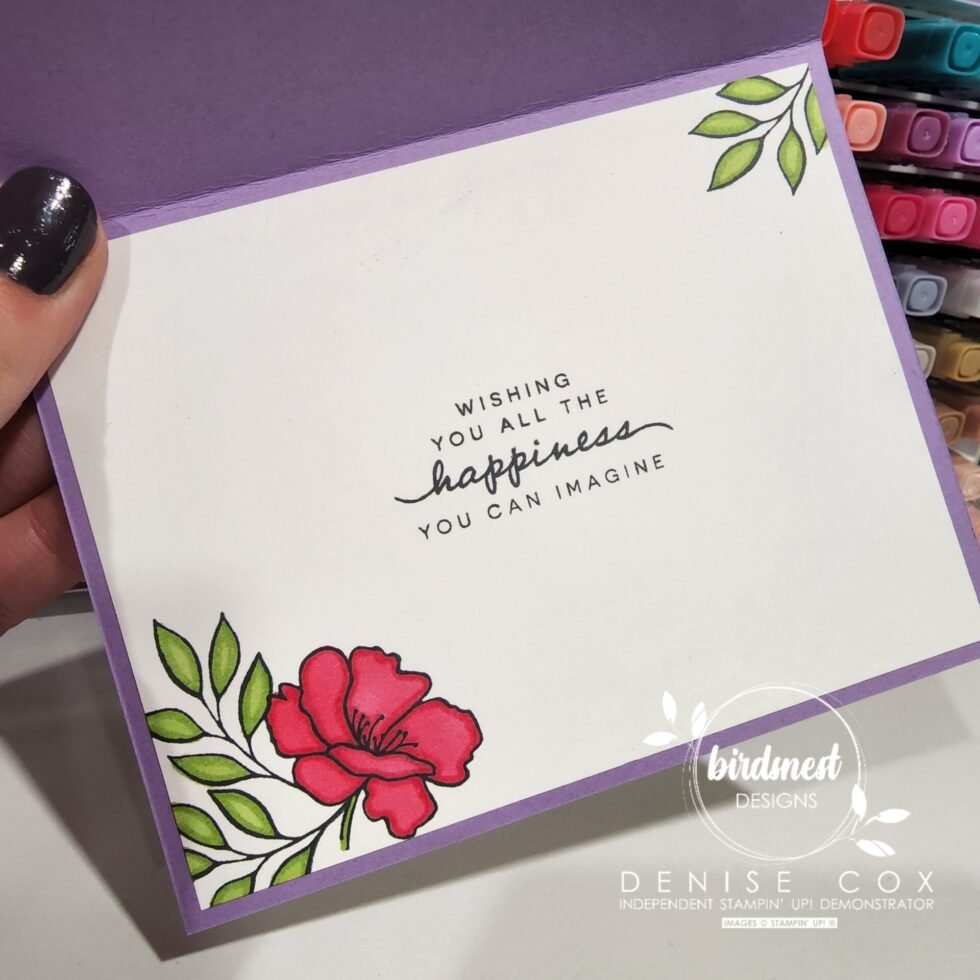
- Don’t forget to add a little touch to the inside of your card too … see below how I added stamped images to the 4″ x 5-1/4″ Basic White insert
Stampin’ Up! goodies I used on today’s card
You can purchase Stampin’ Up! products from my online store from anywhere in Canada, I would love to have you shop with me! Click on any of the items below to see it in my online store ? If you have any questions about ordering or need a little help to place your order please contact me … I am happy to help!
")


Gorgeous colours! Lovely sentiment! The perfect birthday card!