Spruced Up Traditional Christmas Card

Hello and Happy Monday! I am so excited to introduce you to my product of the week … the fabulous Spruced Up bundle! Seriously this bundle is amazing!
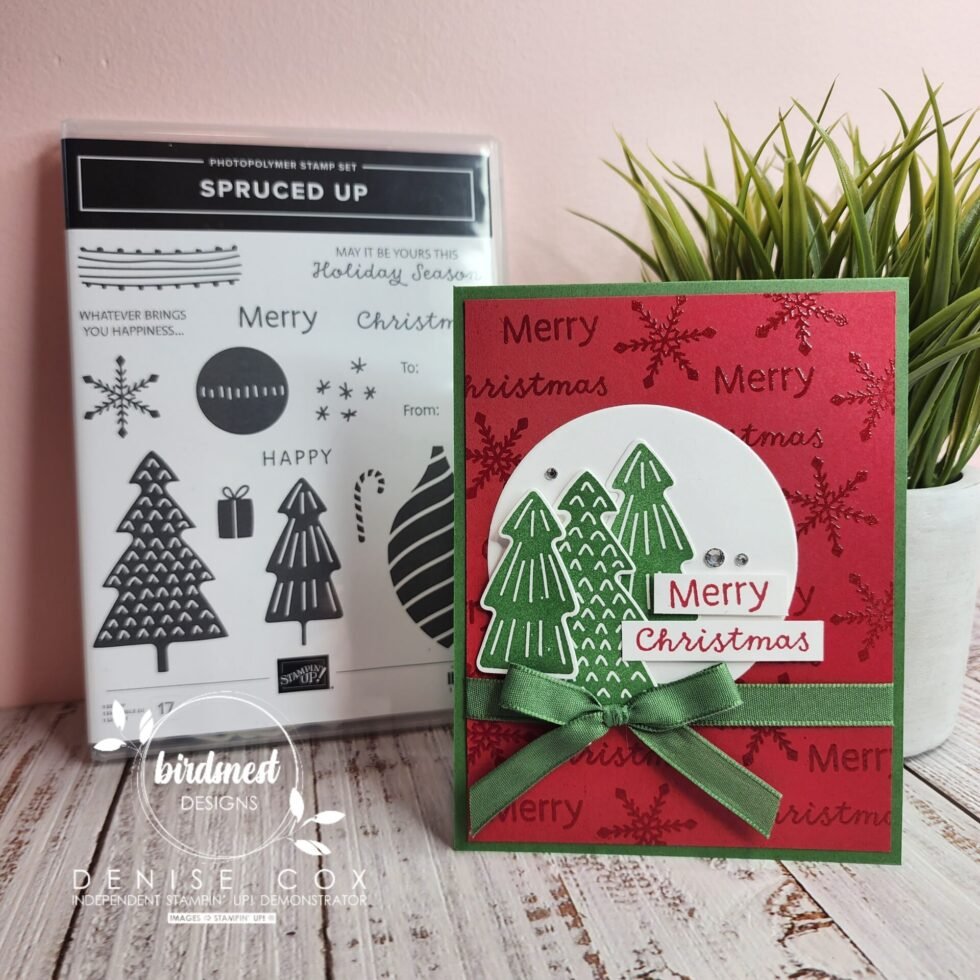
I am starting off the week with a Christmas card in traditional red and green Christmas colours and added a little flare with a heat embossed background. Once I started playing with this set it was really hard to stop … I have so many fun projects to share that I think I will be posting everyday this week!!
To learn how I have created today’s card scroll down to the “Let’s Make It” section and at the bottom of today’s post you will also see a list of all of the products I used. Each product has a link to make it easy for you to take a closer look at the products in my online store.
Thanks for stopping by today! Wishing you a wonderful day and Happy Stamping!!


Let’s Make this Spruced Up Christmas Card!
- Cut a Garden Green card base (11 x 4-1/4) then score in half (5-1/2) and fold to create your card
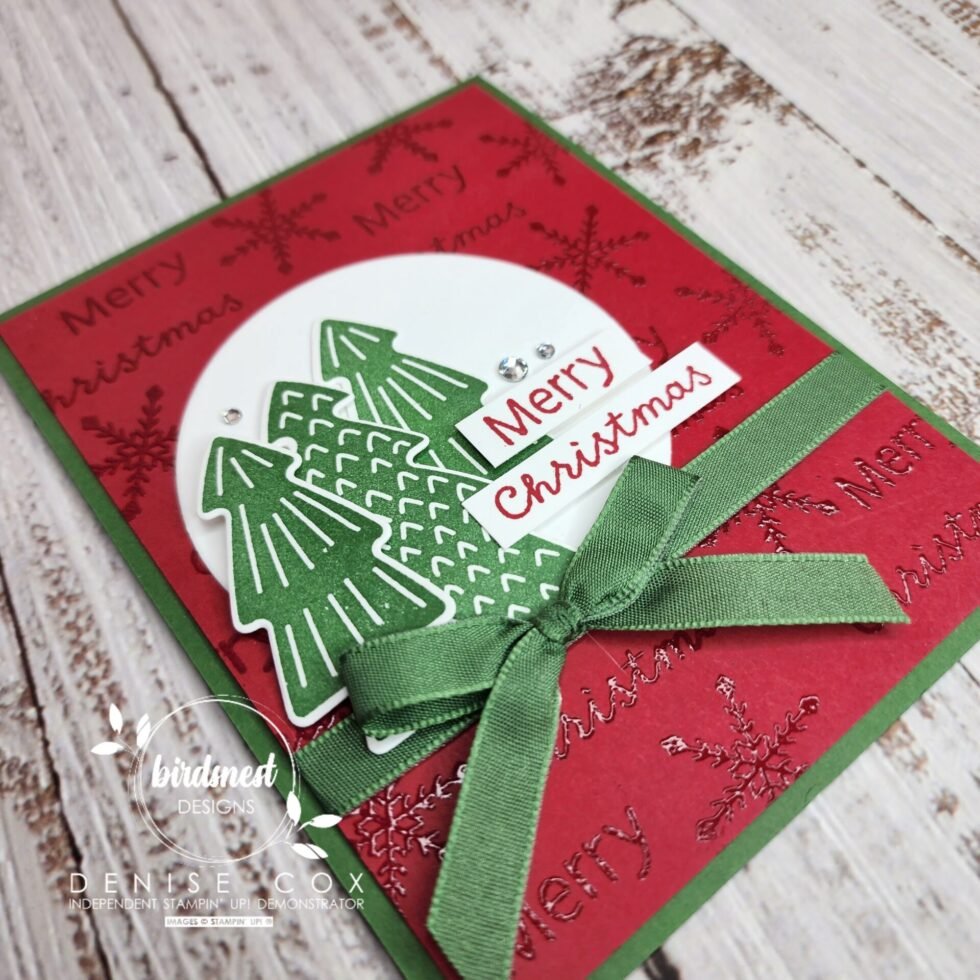
- On a 4 x 5-1/4 piece of Real Red cardstock stamp ‘Merry’, ‘Christmas’ and the snowflake stamps in versa mark repeatedly to cover the panel, then heat emboss them using clear embossing powder and your heat emboss tools
- Die cut a large circle from the Layering Circles dies from Basic White cardstock and stamp one of the smaller trees in the center with Garden Green ink, attach to the card front
- Wrap a piece of Garden Green ribbon across the cardstock just below the circle, adhere to the back and then attach this to the card front
- Tie a bow with an additional piece of ribbon and attach with a mini glue dot
- On a separate piece of white paper stamp one of each of the trees with Garden Green ink and die cut with the coordinating dies then layer these on the card with stampin’ dimensionals
- Stamp ‘Merry’ and ‘Christmas’ on small strips of Basic White cardstock and attch with stampin’ dimensionals
- Add a little sparkle by adhering three Rhinestone Basic Jewels to the circle around the trees
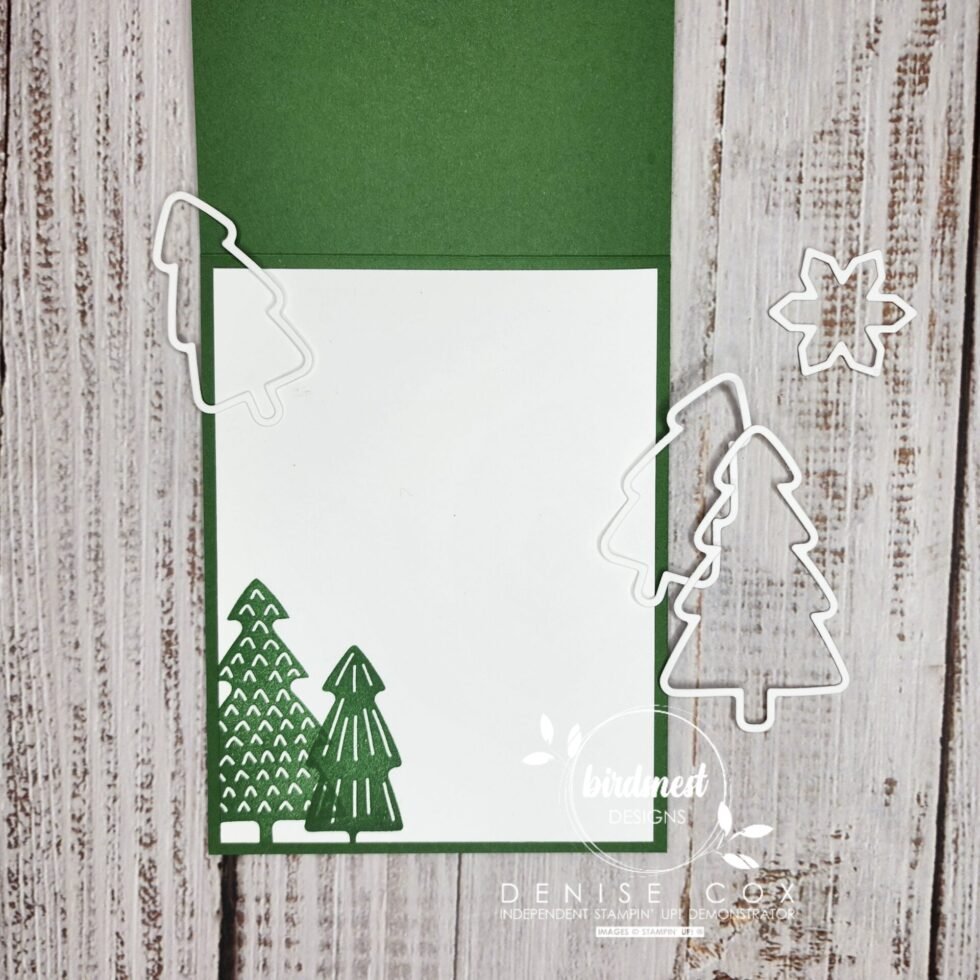
- Add some love to the inside of your card by stamping on a layer (4 x 5-1/4) of Basic White cardstock and attaching it inside… take a peek below to see how I decorated mine!

Stampin’ Up! goodies I used on today’s card
You can purchase Stampin’ Up! products from my online store from anywhere in Canada, I would love to have you shop with me! Click on any of the items below to see it in my online store ? If you have any questions about ordering or need a little help to place your order please contact me … I am happy to help!
")


")
 Ribbon Combo Pack")


