Stained Glass Card on Vellum Using Heat Embossing
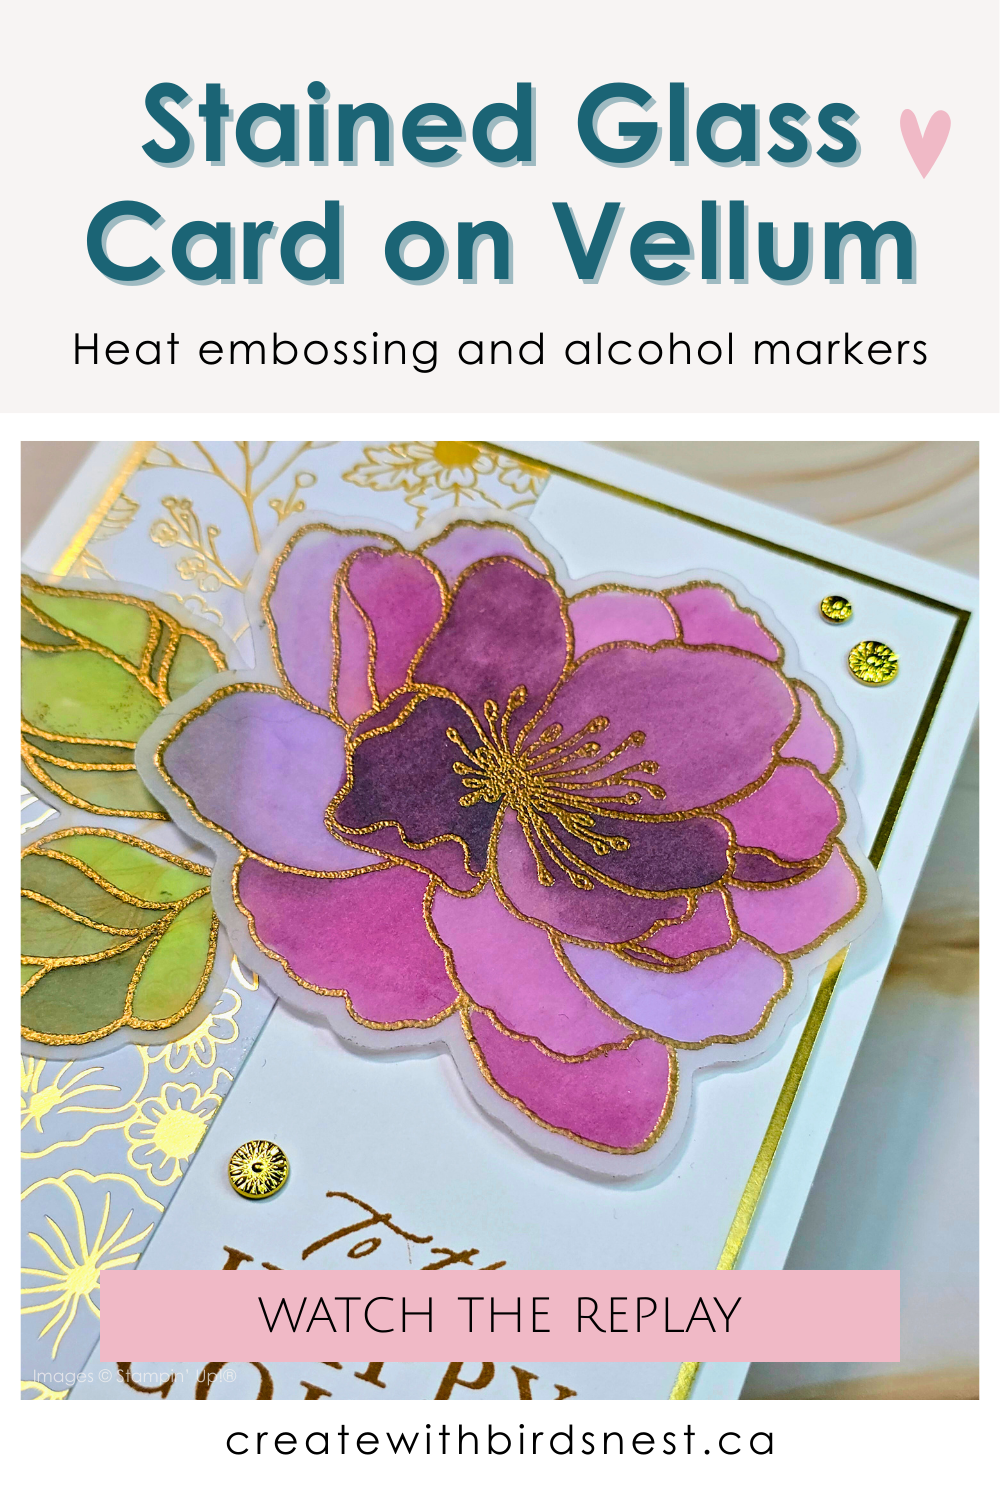
This week I pulled out an old favourite and gave it a fresh little twist. We played with a stained glass look on vellum using heat embossing and colouring with alcohol markers, and honestly, it was so much fun to make.
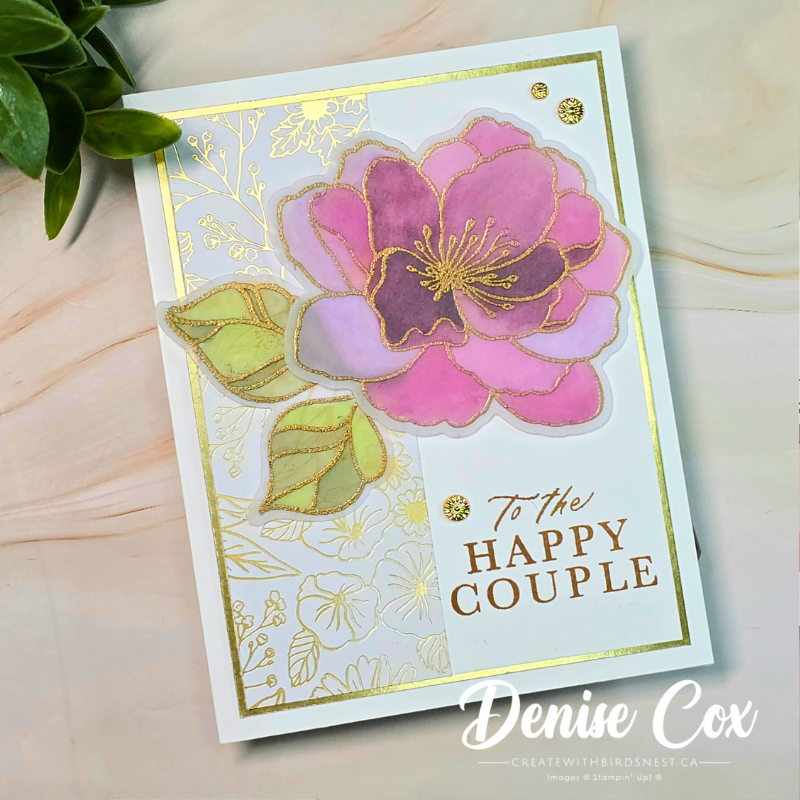
I used the Simply Beautiful Bundle from Stampin’ Up! for this card, the large floral image is perfect for this technique. Heat embossing the image in gold on vellum creates those beautiful raised lines, and then the real magic happens when you flip it over and start colouring on the back. There’s no need to be precise here. Scribbling is allowed and encouraged. That’s part of the charm.
One of my favourite parts of this project was mixing colours instead of sticking to just one. Using a few shades on the leaves and petals really gives that stained glass feel and adds so much depth. I also shared a couple of alternate versions during the live, including one using butterflies from my stash, just to show how versatile this idea can be.
This is one of those techniques that looks a bit fancy but is actually very approachable, especially if you already have vellum, embossing powder, and markers or blends on hand.
Watch the Replay and learn the technique
You can watch the full replay below and craft along when it works for you.
Supplies Used
Here’s a look at the supplies I used to create this stained glass card. Feel free to swap in similar stamps, dies, or colouring tools from your own stash. This technique is very flexible and works beautifully with any image that has open sections to colour.
![Simply Beautiful Bundle (English) [ 166965 ]](https://assets1.tamsnetwork.com/images/EC042017NF/166965s.jpg "Simply Beautiful Bundle (English) [ 166965 ]")
![Lovely & Beautiful 12" X 12" (30.5 X 30.5 Cm) Specialty Designer Series Paper [ 166957 ]](https://assets1.tamsnetwork.com/images/EC042017NF/166957s.jpg "Lovely & Beautiful 12\" X 12\" (30.5 X 30.5 Cm) Specialty Designer Series Paper [ 166957 ]")
![Gold Foil Sheets [ 132622 ]](https://assets1.tamsnetwork.com/images/EC042017NF/132622s.jpg "Gold Foil Sheets [ 132622 ]")
![Vellum 12" X 12" (30.5 X 30.5 Cm) Specialty Paper [ 167099 ]](https://assets1.tamsnetwork.com/images/EC042017NF/167099s.jpg "Vellum 12\" X 12\" (30.5 X 30.5 Cm) Specialty Paper [ 167099 ]")
![Metallics Wow! Embossing Powder [ 165678 ]](https://assets1.tamsnetwork.com/images/EC042017NF/165678s.jpg "Metallics Wow! Embossing Powder [ 165678 ]")
![Embossing Additions Tool Kit [ 159971 ]](https://assets1.tamsnetwork.com/images/EC042017NF/159971s.jpg "Embossing Additions Tool Kit [ 159971 ]")
![Versamark Pad [ 102283 ]](https://assets1.tamsnetwork.com/images/EC042017NF/102283s.jpg "Versamark Pad [ 102283 ]")
![Heat Tool (Us And Canada) [ 129053 ]](https://assets1.tamsnetwork.com/images/EC042017NF/129053s.jpg "Heat Tool (Us And Canada) [ 129053 ]")
![Flower Accents [ 165171 ]](https://assets1.tamsnetwork.com/images/EC042017NF/165171s.jpg "Flower Accents [ 165171 ]")
![Mossy Meadow Stampin' Blends Combo Pack [ 154890 ]](https://assets1.tamsnetwork.com/images/EC042017NF/154890s.jpg "Mossy Meadow Stampin' Blends Combo Pack [ 154890 ]")
![Granny Apple Green Stampin' Blends Combo Pack [ 154885 ]](https://assets1.tamsnetwork.com/images/EC042017NF/154885s.jpg "Granny Apple Green Stampin' Blends Combo Pack [ 154885 ]")
![Blackberry Bliss Stampin' Blends Combo Pack [ 154877 ]](https://assets1.tamsnetwork.com/images/EC042017NF/154877s.jpg "Blackberry Bliss Stampin' Blends Combo Pack [ 154877 ]")
![Berry Burst Stampin’ Blends Combo Pack [ 161681 ]](https://assets1.tamsnetwork.com/images/EC042017NF/161681s.jpg "Berry Burst Stampin’ Blends Combo Pack [ 161681 ]")
![Petunia Pop Stampin’ Blends Combo Pack [ 163828 ]](https://assets1.tamsnetwork.com/images/EC042017NF/163828s.jpg "Petunia Pop Stampin’ Blends Combo Pack [ 163828 ]")
![Fresh Freesia Stampin' Blends Combo Pack [ 155518 ]](https://assets1.tamsnetwork.com/images/EC042017NF/155518s.jpg "Fresh Freesia Stampin' Blends Combo Pack [ 155518 ]")
![Pecan Pie Classic Stampin' Pad [ 161665 ]](https://assets1.tamsnetwork.com/images/EC042017NF/161665s.jpg "Pecan Pie Classic Stampin' Pad [ 161665 ]")
Thanks for spending a little creative time with me today. I hope this encourages you to dust off some vellum and give this stained glass look a try.
Stay connected 🩷
🛒 Shop Stampin’ Up! Products with Me
💌 Join My Email List – Get a FREE tutorial!
📺 Subscribe to My YouTube Channel
💬 Connect with Me on Facebook
That is fantastic! I’m going to try it!
So pretty! Thanks for sharing