Hello crafty friends and welcome to today’s post! I am so excited to share this fun fold card with you today as the final project featuring the This Birthday Piggy stamp set. I do believe that I have saved the best for last!
Let’s Make It!
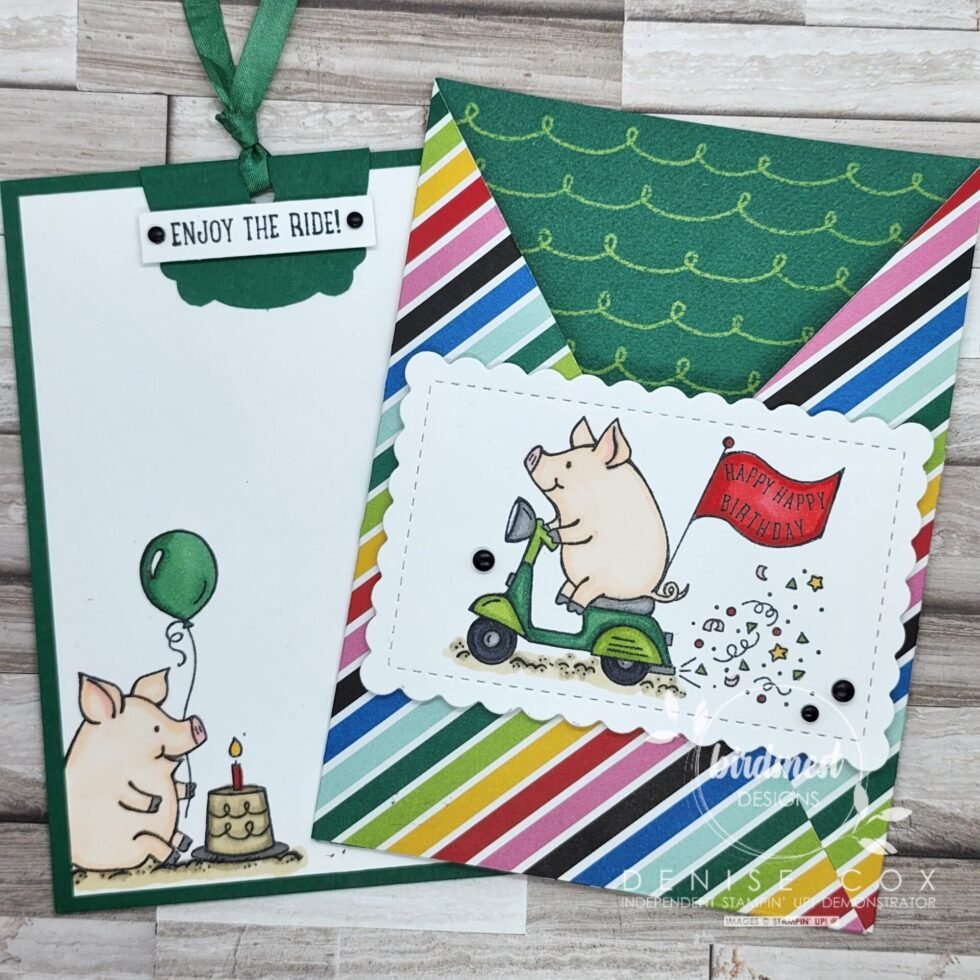
This Pocket Fold card is really quite simple to create and it’s a super fun alternative to a basic card. I created a quick little video slide for you to see how to create the pocket base for today’s project. Just click play on the video and take a look.
I used a piece of Designer Series Paper (DSP) from the Host Exclusive Celebrate Everything collection from the upcoming July – December Mini Catalogue. This is one Awesome paper collection! Start planning to host a stamp party for you and your friends so that you can get this paper. It is definitely a MUST HAVE on my list!
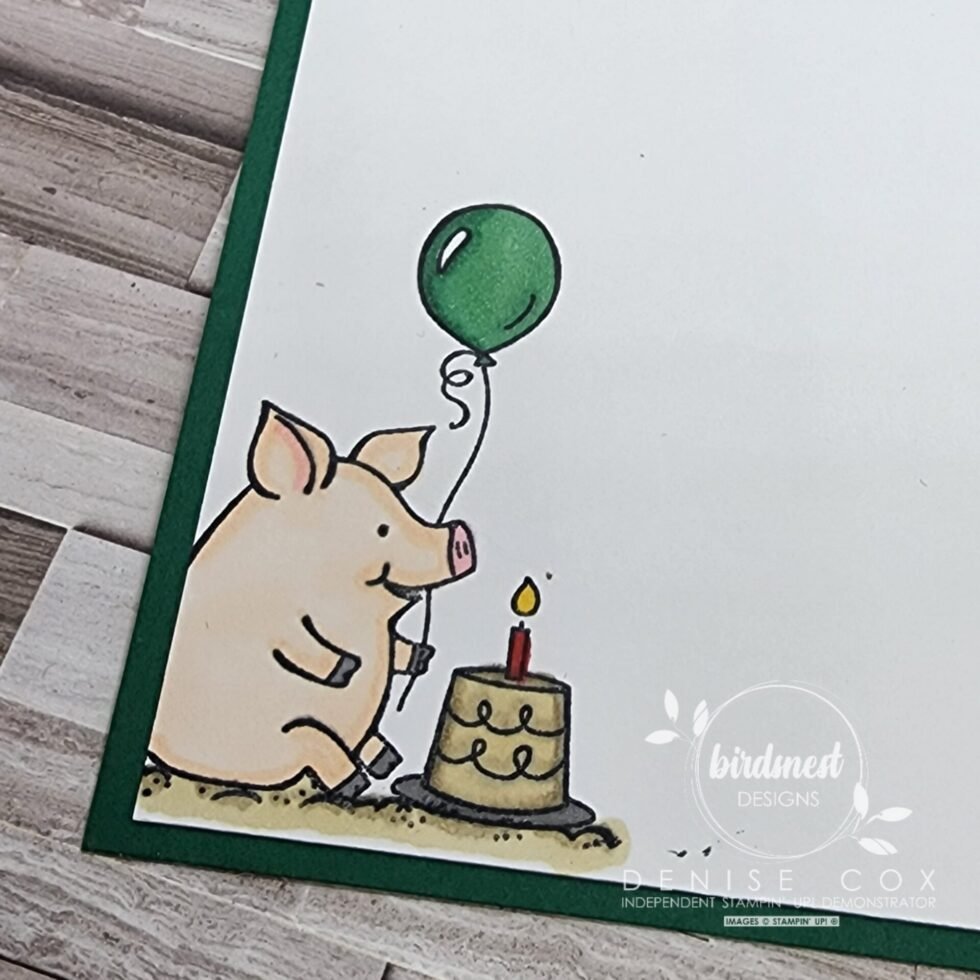
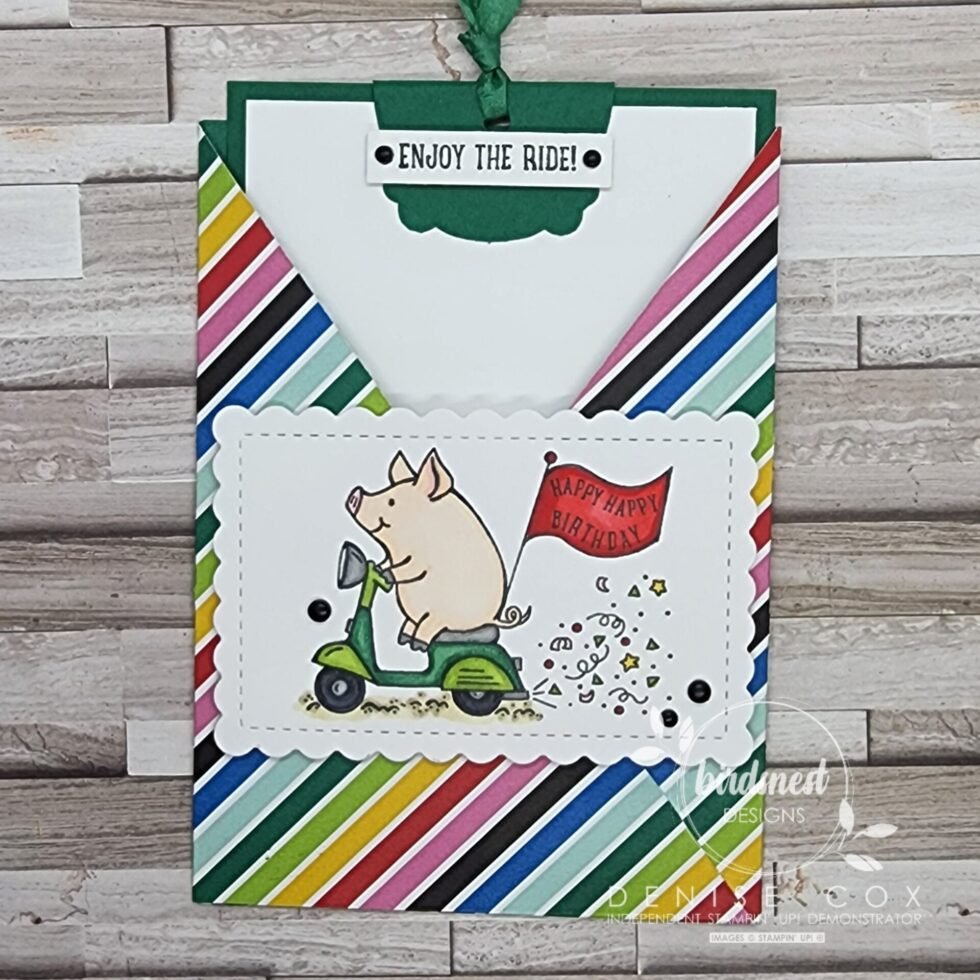
Once you have created the pocket it is time to stamp and decorate the rest of the card. The pull out for the pocket card is made up of a 3-1/2″ x 5″ piece of Basic White cardstock and a piece of 3-3/4″ x 5-1/4″ Shaded Spruce cardstock. To start with I stamped the little piggy with his birthday cake from the This Birthday Piggy stamp set on to the bottom left corner of the Basic White cardstock using Tuxedo Black Memento ink. Then I coloured the image in using my Stampin’ Blends and attached this piece to the Shaded Spruce cardstock.
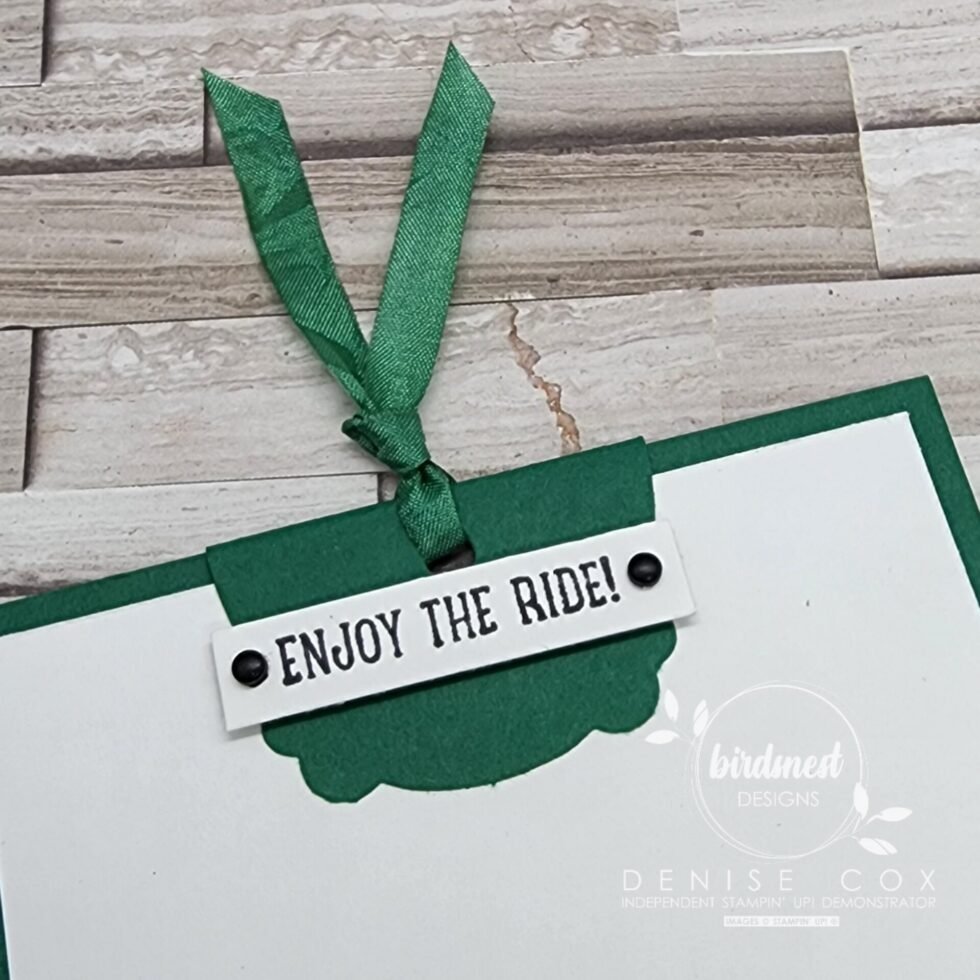
I punched out a label from Shaded Spruce cardstock using the Lasting Label punch to create the topper for the pull out. I folded the label in half and adhered centered over the top. Next I punched a hole that through the middle that I could later feed my ribbon through.
On a small 3/8″ wide strip of cardstock I stamped the Enjoy the Ride sentiment in black ink and adhered it with Stampin’ Dimensionals directly below the hole. When I got to this point I realized that I did not have any Shaded Spruce ribbon to use on this card so I made some! I cut a piece of White 1/4″ Crinkled Seam Binding and coloured it with a dark Shaded Spruce Stampin Blends marker. Voila – Shaded Spruce ribbon to coordinate with my project. I love the versatility of these alcohol based markers.
Now that I have the ribbon to match I just looped it through the hole, tied it in a knot and trimmed the ends. The Classic Matte Dots are perfect for this project … I added a small black one to either end of the sentiment to complete the card pull out!
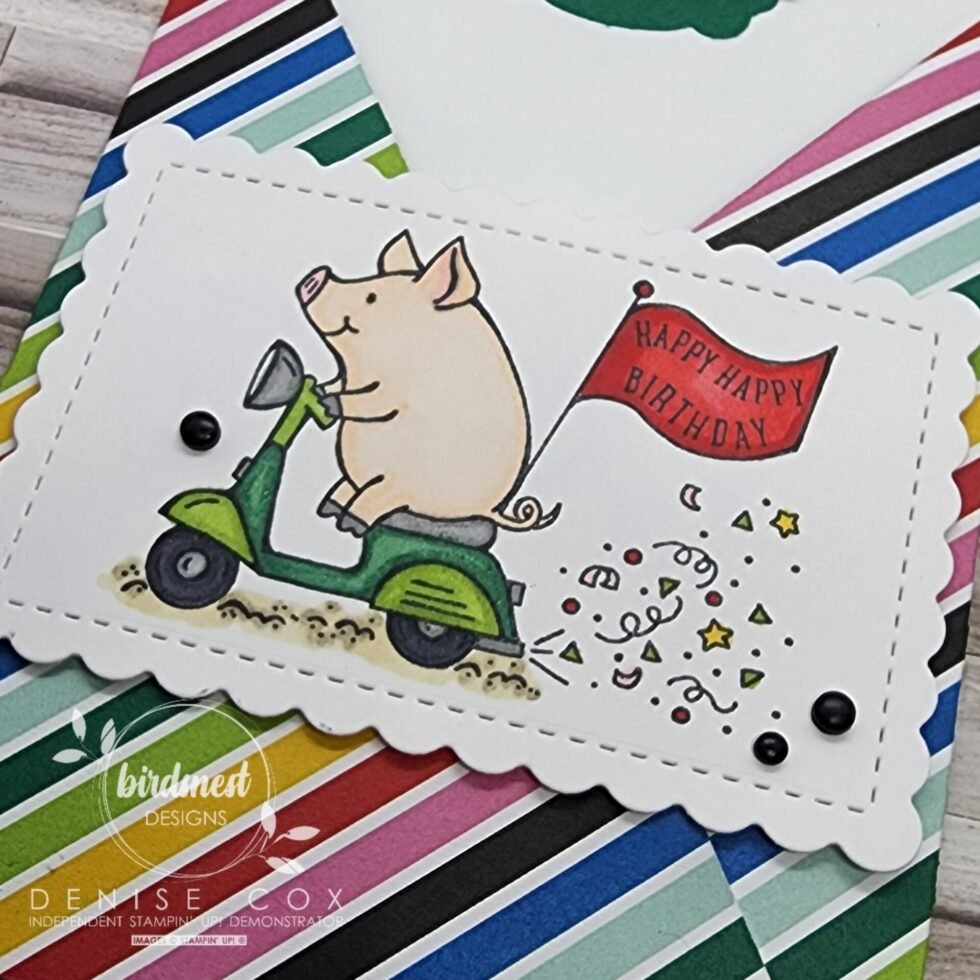
Ok now it is time to create the adorable front of the Pocket Fold card. Using the Stampin’ Cut & Emboss machine, Basic White cardstock and the Scalloped Contour dies I die cut out the stitched, scalloped rectangle.
I stamped the scooter riding piggy from the This Birthday Piggy stamp set in the center of the die cut using Tuxedo Black Memento ink. Then I coloured the whole image in with Stampin’ Blends markers. You’ll find a list of all of the colours that I used along with all the other supplies to make today’s project at the end of this post.
Once coloured, I attached this piece to the front of the pocket using Stampin’ Dimensionals. To add a finishing touch I adhered three black Classic Matte Dots to the die cut label to tie everything together. I love the way that this card all came together.
What a fun week I had stamping and creating with the This Birthday Piggy stamp set. I hope that you have fallen in love with these adorable little pigs too! If you missed the posts earlier this week you, just click on the link and check them out!
If you would like to add the This Birthday Piggy stamp set to your stamp stash you can find it in my online store HERE or on page 55 of the 2022-2023 Annual Catalogue.
Thank you so much for poppng in today I hope you leave feeling inspired to do a little stamping of your own!
Have a wonderful weekend …. Happy Stamping!

Product List for This Birthday Piggy Pocket Fold Card
")


 Crinkled Seam Binding Ribbon")