Fitting Florets Demonstrator Training Blog Hop

Hello and welcome to our Fitting Florets Demonstrator Training Blog Hop. We are a group of Stampin’ Up! demonstrators from around the world that have come together to share tons of inspiration using the newly released Fitting Florets Collection. Whether you are starting here or have hopped on over from another blog, thank you for stopping in! When you are finished looking through my project post today please hop on over to the others that are participating, their links can be found at the bottom of this post. Remember to leave us a comment – we love to hear from you ❤
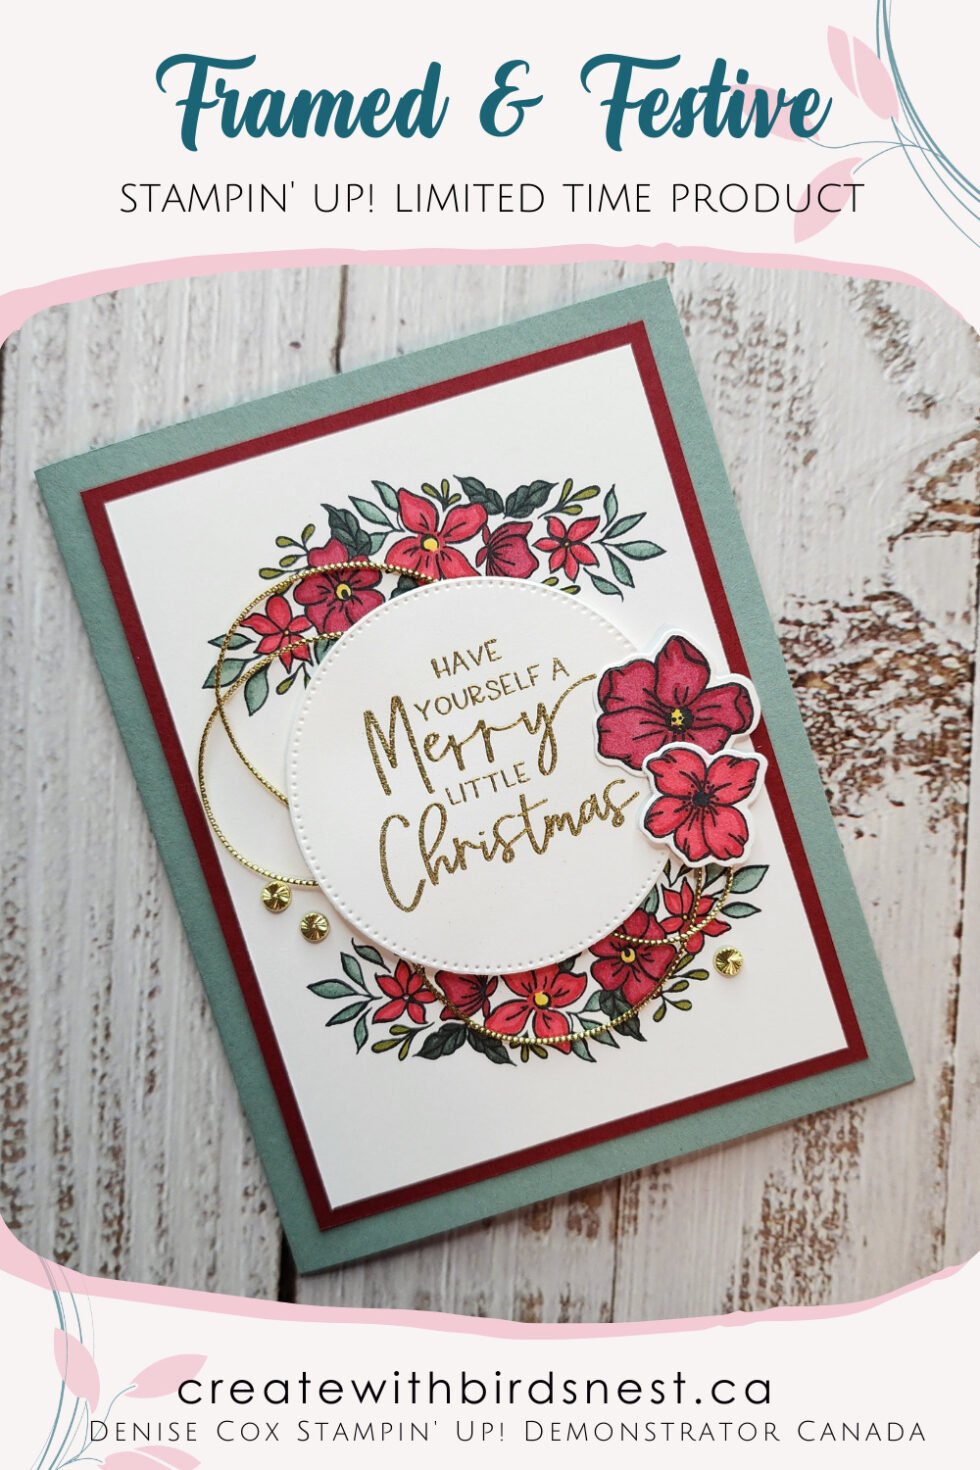
Starting today you can purchase the gorgeous Fitting Florets Collection from my online store. This is one of the prettiest collections that I have seen in a long time and I am loving everything about it! The Framed Florets bundle will be available in the Jan-Jun Mini Catalogue but the Framed & Festive stamp set, Fitting Florets 12 x 12 DSP and the Gold Adhesive-Backed Swirls are limited time products and are only available while supplies last!
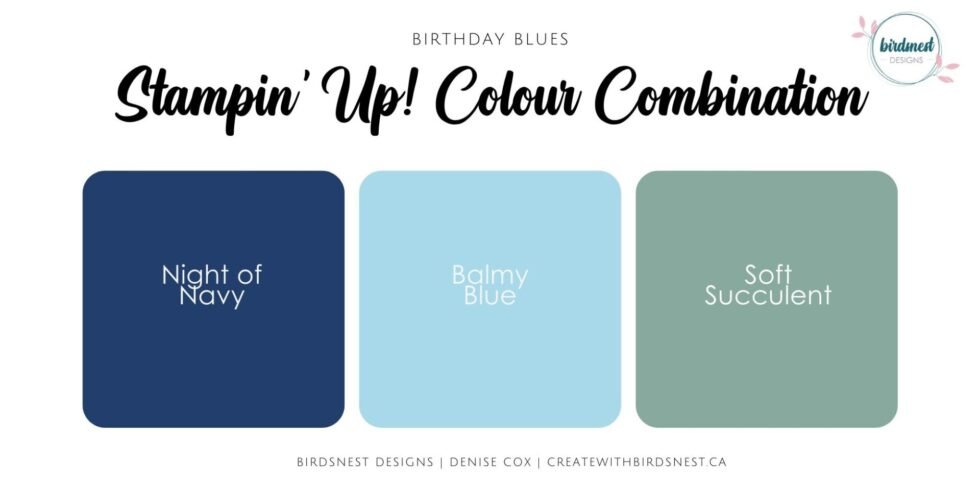
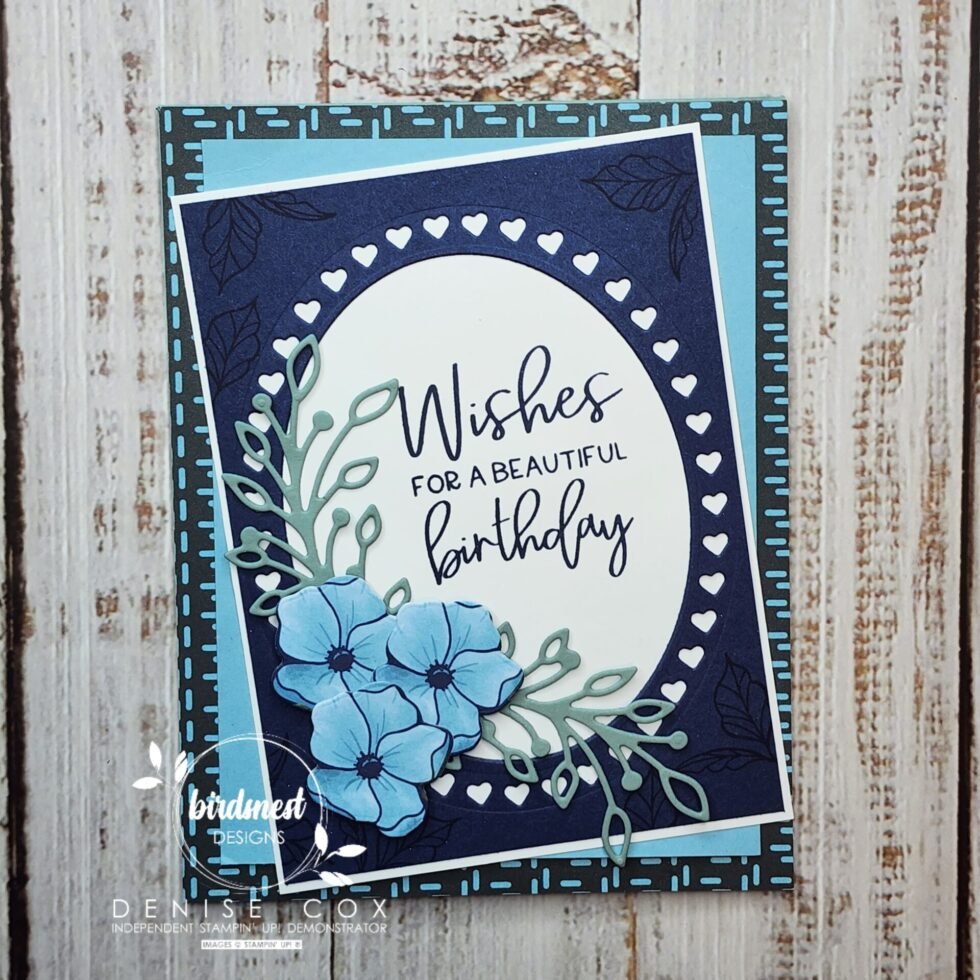
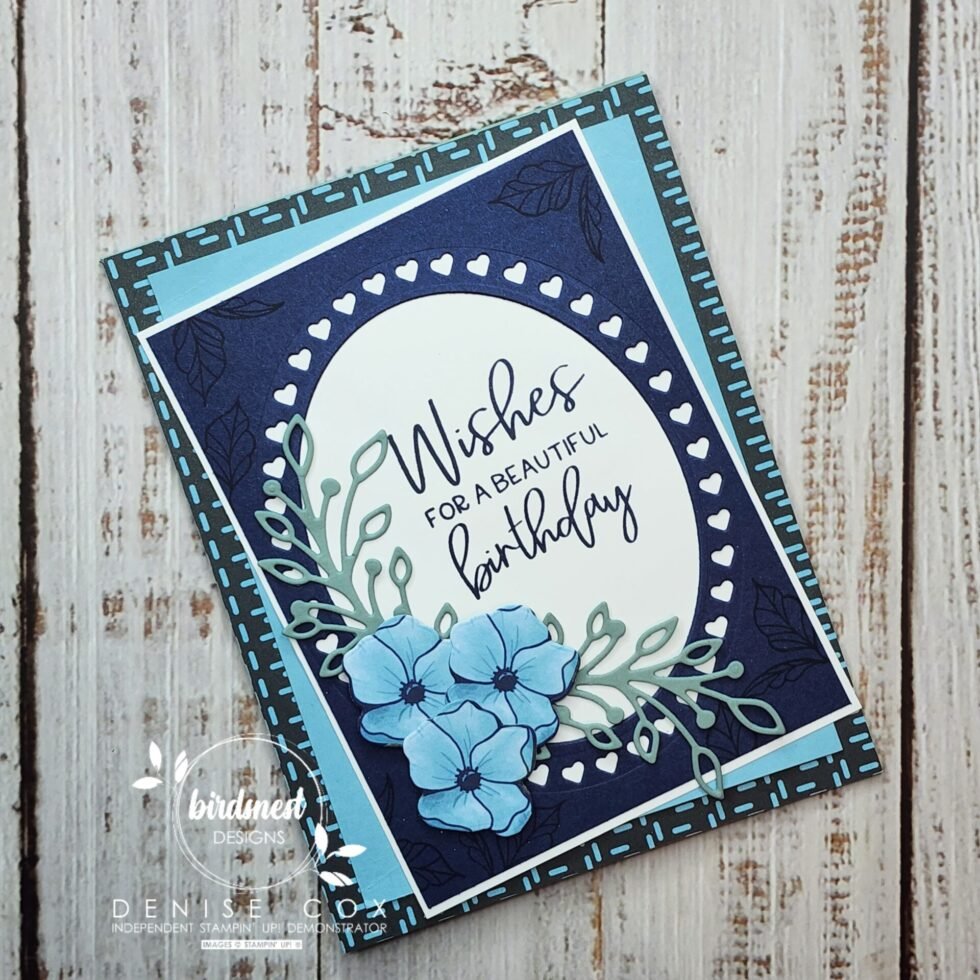
Keep scrolling through this post to find instructions, colour combo and product links used on this pretty blue Birthday card.

Let’s Make It!
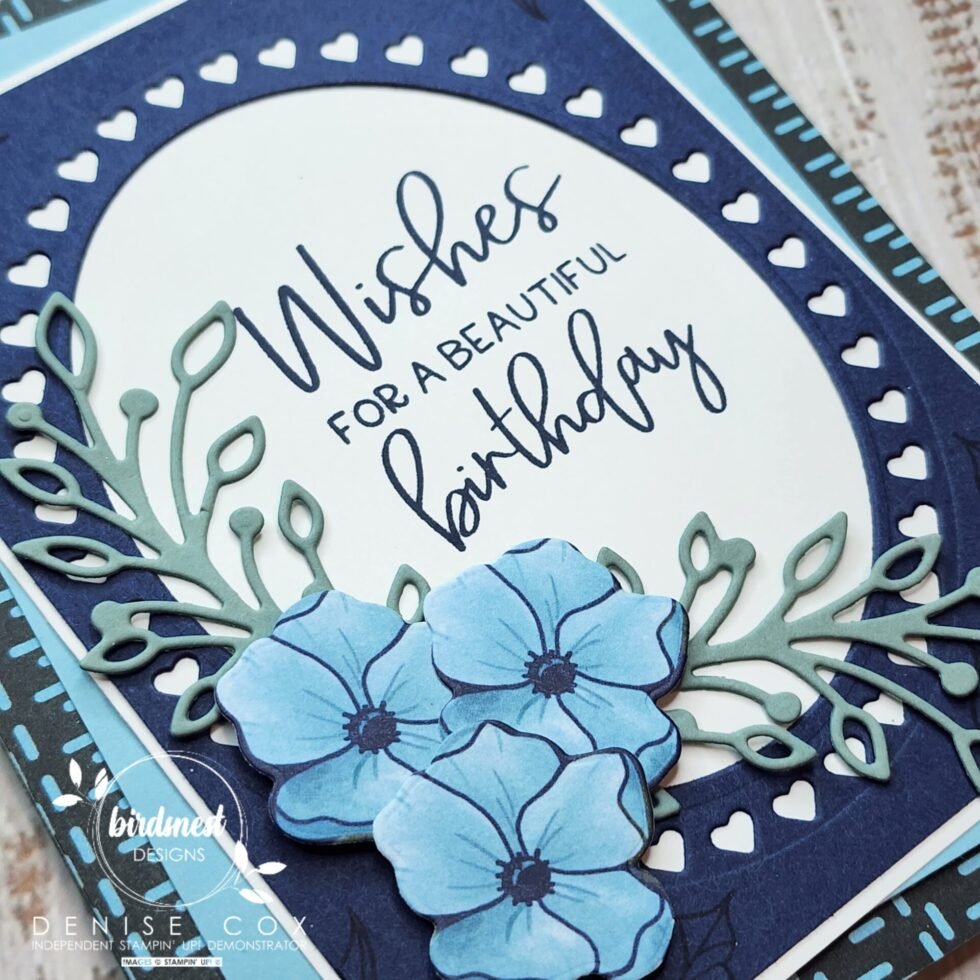
- Start with a Soft Succulent card base cut to 11″ x 4-1/4″ and scored in half at 5-1/2″
- Adhere a 4-1/4″ x 5-1/2″ piece of the Fitting Florets Designer Series Paper (DSP) to the card front
- Next add a 3-3/4″ x 5″ panel of Balmy Blue cardstock
- Cut the hearts frame and the oval (striped) frame out of the center of a 3-1/2″ x 4-3/4″ piece of Night of Navy cardstock. The striped frame in the center of the hearts frame creates the oval cutout in the middle
- Using the leaf stamp and Night of Navy ink, stamp images in all four corners and then attach this piece on to a 3-5/8″ x 4-7/8″ piece of Basic White cardstock
- Stamp the birthday greeting in the white oval with Night of Navy ink placing it a little to the left side – adhere this piece to the card front on an angle
- Die cut two of the branch accent pieces from the Framed Florets dies from Soft Succulent cardstock and attach in opposite directions in the bottom left of the oval
- From the Fitting Florets DSP die cut three blue flowers with the coordinating die and then cluster them over where thee branch die cuts meet and adhere with stampin’ dimensionals
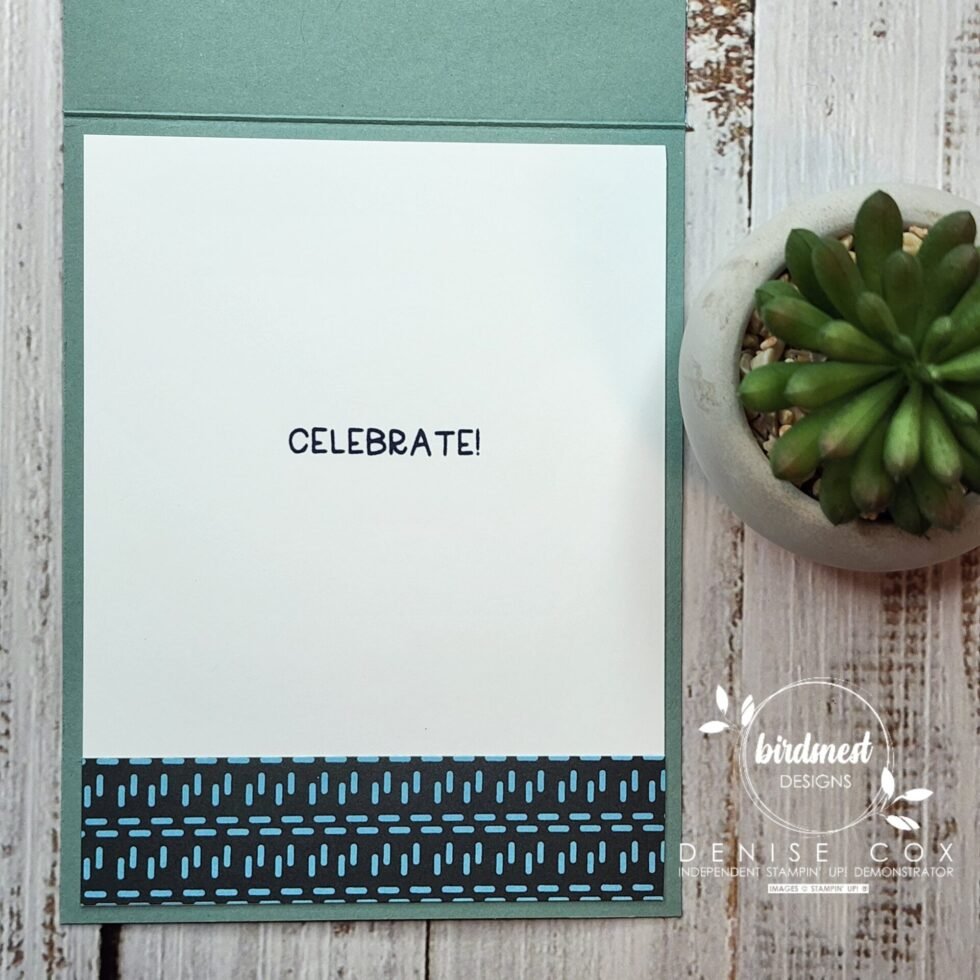
- Don’t forget to add a little love to the inside of your cards too … check out the photo below to see how I decorated the 4″ x 5-1/4″ Basic White card insert

Thank you for hopping in today I hope that you enjoyed my project today. Please click on any of the other participant links to see more beautiful card inspiration for this brand new collection!

How to Purchase the Fitting Florets Products
Live in Canada? All of the supplies used in today’s card project can be purchased from my online store! A full list of the Stampin’ Up! goodies and their product links are listed below.
")


Fitting Florets Blog Hop Participants


Very nice color combination. Beautiful card!
Thank you Theresa!
So pretty Denise! I just love the frame of hearts!
Pretty cards
I love your card, Denise! The colour scheme is so pretty!
Very pretty card Denise
Sweet card!