Spruced Up & Celebrate Everything Christmas Card

Happy Friday friends it’s nice to see you! Today wraps up my week long sharing of projects created with the Stampin’ Up! Spruced Up bundle. This quickly has become one of my favourites this season!
I enjoy creating holiday cards in non-traditional colours and with the Celebrate Everything Designers Series Paper this is really easy! It has such bright and playful colours in it! This paper is a host exclusive product, you can purchase it when you host a qualifying Stampin’ Up! party with me OR when you place an order yourself of $200 or more. If you would like to find out more about hosting a party and earning free products please contact me – I’d love to party with you!!
If you would like to create this card yourself , keep scrolling, I have the instructions here for you. At the bottom of today’s post you will also see a list of all of the products I used with links to make it easy for you to take a closer look at them in my online store. If you’ve missed the other posts this week just click here and you’ll be able to see them all!

Thanks for stopping by today! Wishing you a wonderful weekend and Happy Stamping!!

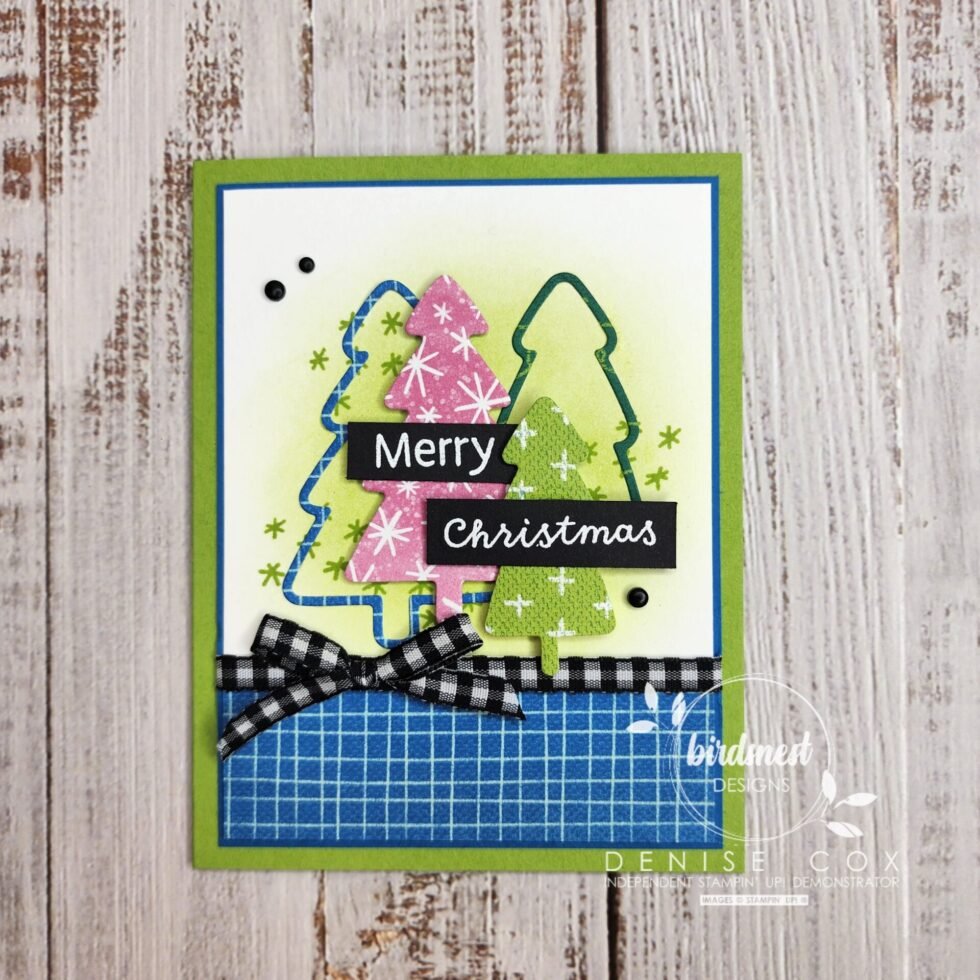
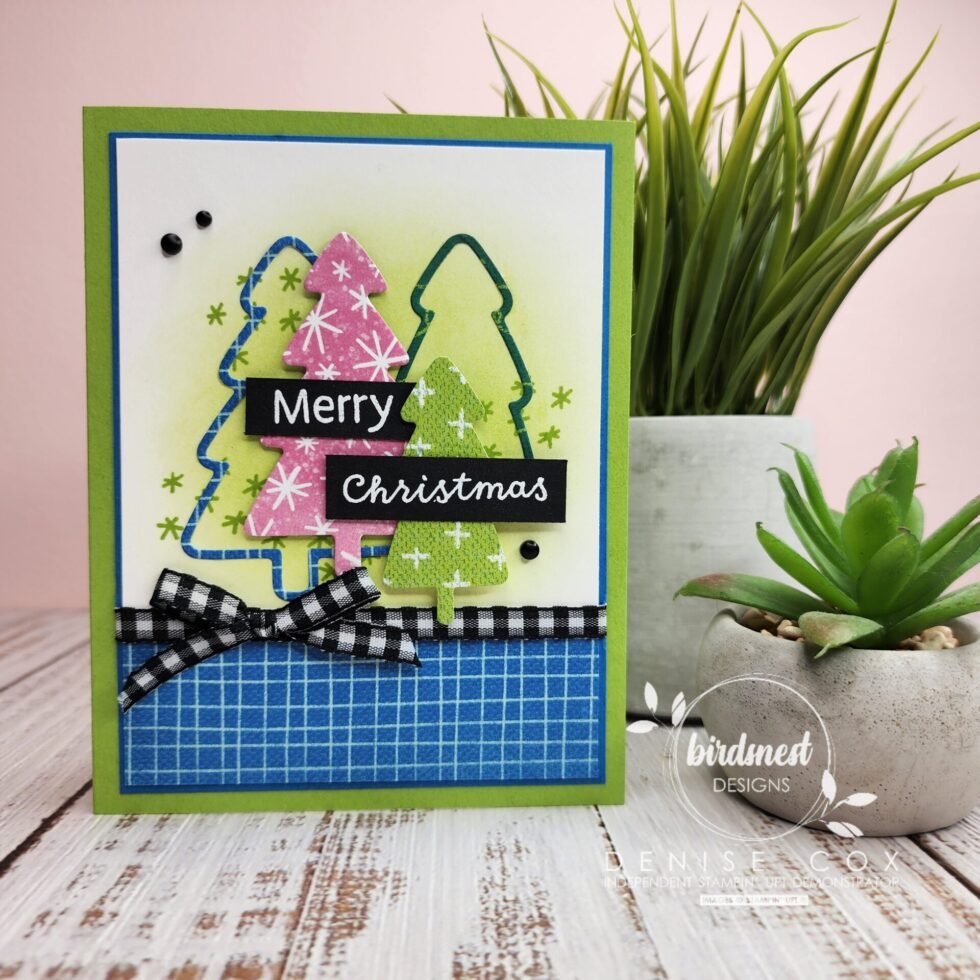
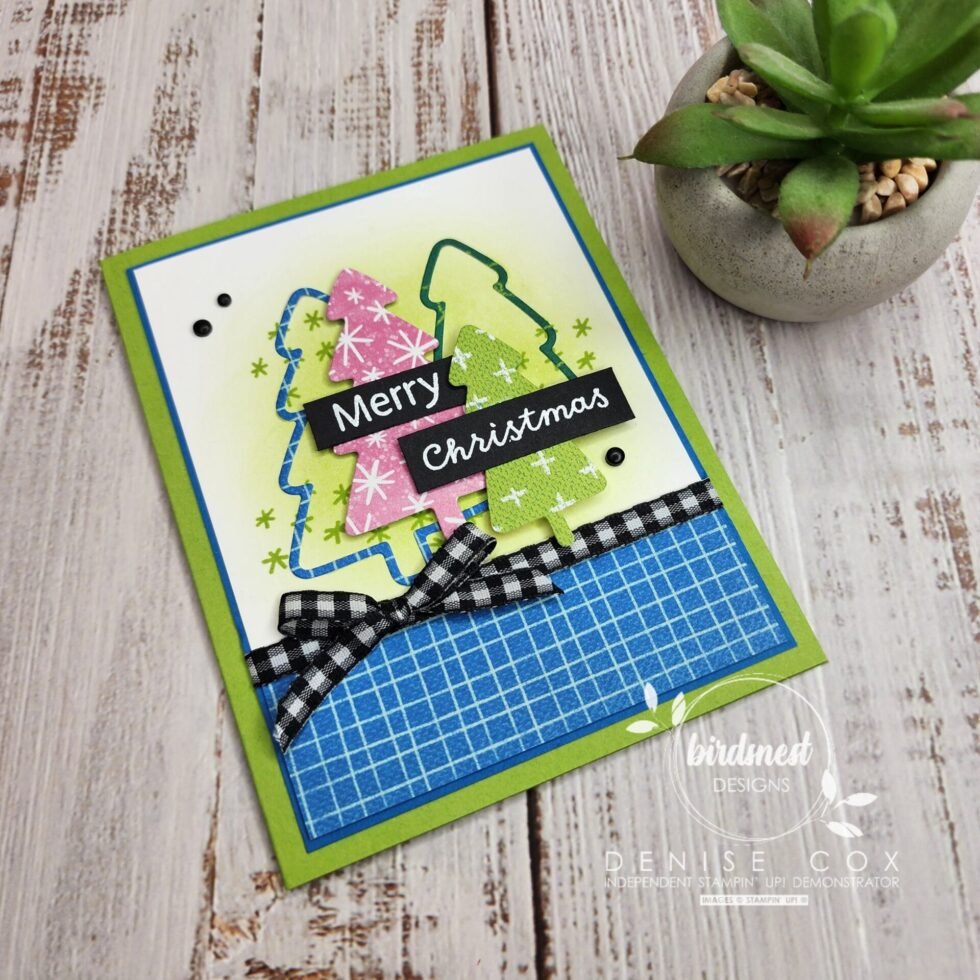
Let’s Make this Spruced Up Christmas Card!
- Cut a Granny Apple Green card base (8-1/2 x 5-1/2), score in half and fold to create your card
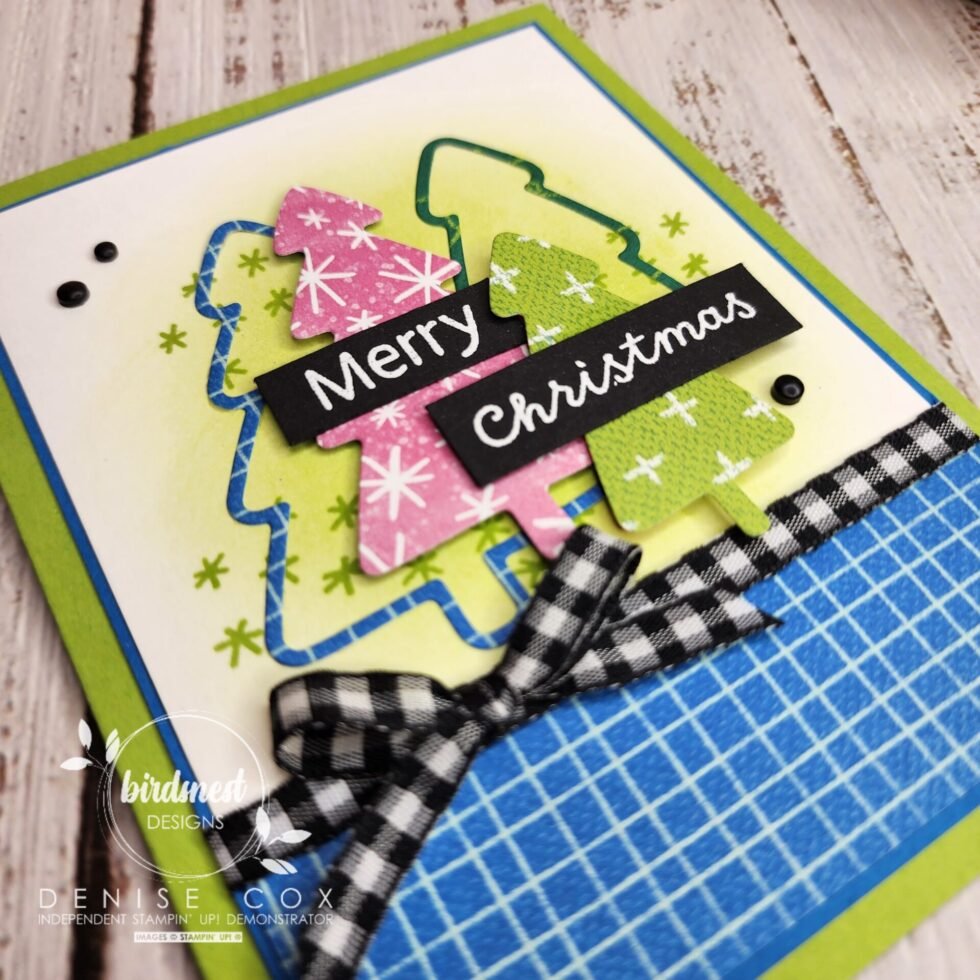
- On a 3-3/4 x 5 piece of Basic White, use a blending brush with Granny Apple Green ink and blend some colour into the center of the paper
- Stamp the little stars image with Granny Apple Green around the blended area
- Layer this piece on to a 3-7/8 x 5-1/8 piece of Pacific Point cardstock and then add a 1-1/2″ strip of Designer Series Paper along the bottom
- Wrap a piece of Black & White Gingham ribbon across the top of the DSP and tie a bow to add to the front using a mini glue dot – attach this entire piece to the card front
- Using the Stampin Cut & Emboss Machine and the Spruced Up Outline dies cut the tree images with different patterned paper – add to the card using stampin’ dimensionals on the solid trees
- On 1/2″ strips of Basic Black cardstock, heat emboss the words ‘merry’ and ‘Christmas’ using white embossing powder and then attach to the card as shown
- Add a few black classic matte dots to complete the front of the card
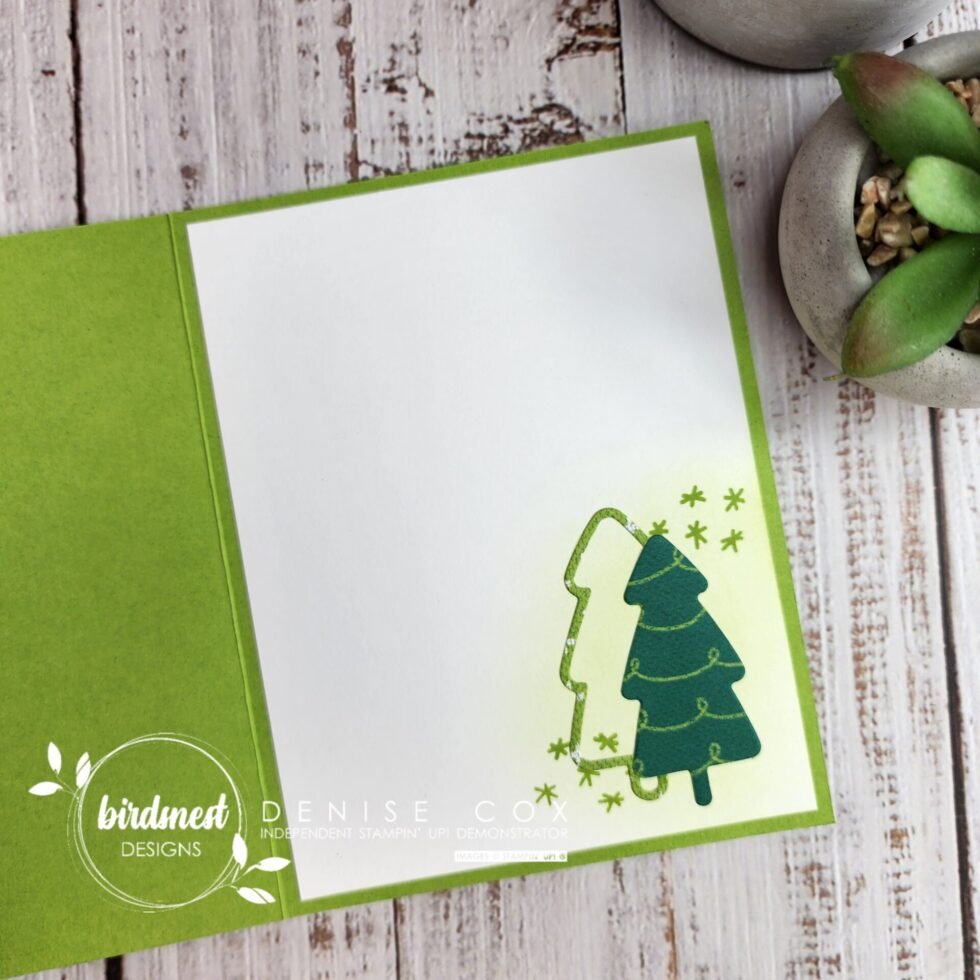
- Don’t forget to add a little love to the inside of your card too … the photo below shows how I decorated mine!
Stampin’ Up! goodies I used on today’s card
You can purchase Stampin’ Up! products from my online store from anywhere in Canada, I would love to have you shop with me! Click on any of the items below to see it in my online store ? If you have any questions about ordering or need a little help to place your order please contact me … I am happy to help!
")


")


