Have you ever skipped a card idea or a class because you didn’t own the featured stamp set?
This week’s project is all about letting go of that pressure and giving yourself permission to create anyway. I’m using one simple layout, the same consumable supplies, and just changing one thing — the stamp set. The result is two cards that look and feel completely different, even though they’re built from the same foundation.
If you love the idea of Craft From Your Stash — using what you already have and seeing possibilities instead of limitations — you’re in the right place 🩷
This project is a gentle reminder that you’re not behind, you’re not missing out, and you already have more than enough to create something beautiful.

This entire project started with a simple question: “What if the stamp set wasn’t the star of the show?”
For both cards, I used:
- The same card layout
- The same cardstock colours
- The same Designer Series Paper
- The same circle die cut
- The same embellishments
The only thing that changed was the stamp set — and that one small swap completely changed the look and feel of the finished card.
This is one of my favourite ways to approach crafting because it helps shift your mindset from “I don’t have that” to “What could I use instead?”
🎥 Watch the Replay
In the video, I walk through both cards step by step, share my Craft From Your Stash thought process, and explain how I decide what stamps can be swapped into a layout like this.
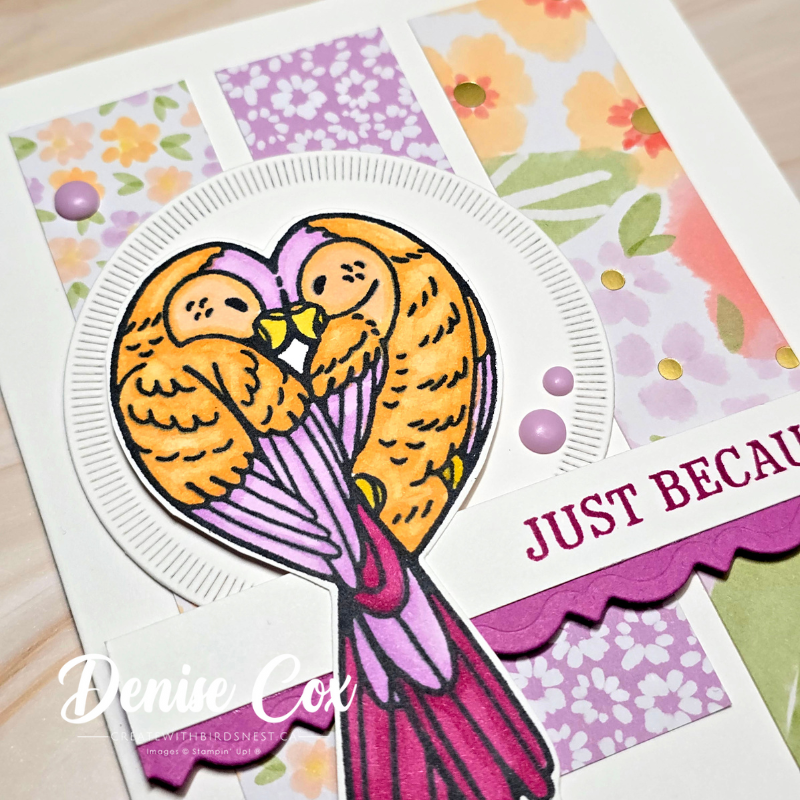
Card #1: Feathered FUN– Soft, Sweet & Sentimental
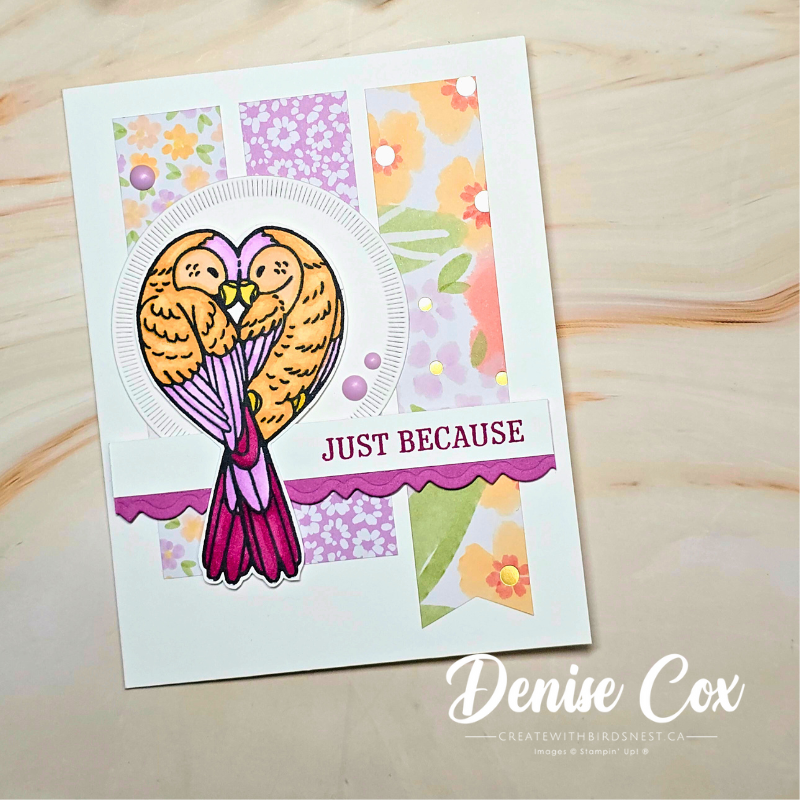
This first card uses the Feathered Fun stamp set and has a soft, heartfelt feel. The image naturally fits the circle die cut and creates a gentle focal point that works beautifully for “just because,” thinking of you, or encouragement cards.
I coloured the birds using Stampin’ Blends pulled straight from the colours in the Designer Series Paper, with a little extra contrast added in for depth. Even though this card uses colouring and fussy cutting, the layout itself stays very simple and repeatable.
Card #2: Share A Milkshake – Playful & Fun
For the second card, I reached into my retired stash and pulled out Share A Milkshake — a stamp set that couldn’t feel more different from the birds.

Instead of colouring with blends, this card uses ink stamping and layered die cuts, but the layout stays exactly the same. The tall shape of the milkshake fits the circle perfectly, which is one of the key things I look for when swapping stamp sets.
This is a great example of how:
- New + retired supplies can work together
- A playful stamp set can live in the same layout as a sentimental one
- You don’t need to redesign — just rethink

How I Choose Substitute Stamp Sets (Craft from your stash Tip)
This simple mindset shift is the heart of my Craft From Your Stash approach and once you see it, you’ll never look at your stamp sets the same way again.
When I’m choosing a substitute stamp set, I’m not focused on what the image is — birds, milkshakes, florals, animals. Instead, I look at:
- Shape – Is the image tall, wide, round, or vertical?
- Scale – Will it fill the space without overpowering the layout?
- Proportion – Does it balance the overall design?
That’s how two completely different stamp sets can both work beautifully in the same layout. Once you start looking at your stamps through this lens, your stash opens up in a whole new way — and suddenly, “I don’t have that” turns into “What could I use instead?”
✂️ simple layout Measurements
This layout is built from three vertical DSP strips and a centered circle focal point, making it easy to adapt to different images and sizes.
- Card Base 8-1/2″ x 5-1/2″ scored at 4-1/4″
- Designer Series Paper: (2) 1″ x 4-1/4″ and (1) 1″ x 5″
- Circle (or any shape you choose): 2-3/4″
- Sentiment strip: 1/2″ x 4″
- Scallop accent: 1/2″ x 4″
Colour Me Happy
🛍️ Supplies Used
![Lovely & Beautiful 12" X 12" (30.5 X 30.5 Cm) Specialty Designer Series Paper [ 166957 ]](https://assets1.tamsnetwork.com/images/EC042017NF/166957s.jpg "Lovely & Beautiful 12\" X 12\" (30.5 X 30.5 Cm) Specialty Designer Series Paper [ 166957 ]")
![Spotlight On Nature Dies [ 163580 ]](https://assets1.tamsnetwork.com/images/EC042017NF/163580s.jpg "Spotlight On Nature Dies [ 163580 ]")
![Feathered Fun Photopolymer Stamp Set [ 165336 ]](https://assets1.tamsnetwork.com/images/EC042017NF/165336s.jpg "Feathered Fun Photopolymer Stamp Set [ 165336 ]")
![Share A Milkshake Bundle (English) [ 160396 ]](https://assets1.tamsnetwork.com/images/EC042017NF/160396s.jpg "Share A Milkshake Bundle (English) [ 160396 ]")
![Fancy Borders Dies [ 165380 ]](https://assets1.tamsnetwork.com/images/EC042017NF/165380s.jpg "Fancy Borders Dies [ 165380 ]")
![Rainbow Adhesive Backed Dots [ 162758 ]](https://assets1.tamsnetwork.com/images/EC042017NF/162758s.jpg "Rainbow Adhesive Backed Dots [ 162758 ]")
These projects are such a good reminder that creativity doesn’t come from owning more — it comes from seeing more possibilities in what you already have.
Whether you loved the soft, sentimental birds or the playful milkshake card, I hope this layout inspires you to look at your stash with fresh eyes and try something new.
If you give this layout a try, I’d love to hear which stamp set you used — and which version you’d send first 🩷
Stay Crafty With Me!
If you enjoyed this project, you might also love my Sketch Night and Craft From Your Stash videos — they’re all about creating without pressure.
🛒 Shop Stampin’ Up! Products with Me
💌 Join My Email List – Get a FREE tutorial!
📺 Subscribe to My YouTube Channel
💬 Connect with Me on Facebook


Leave a Reply