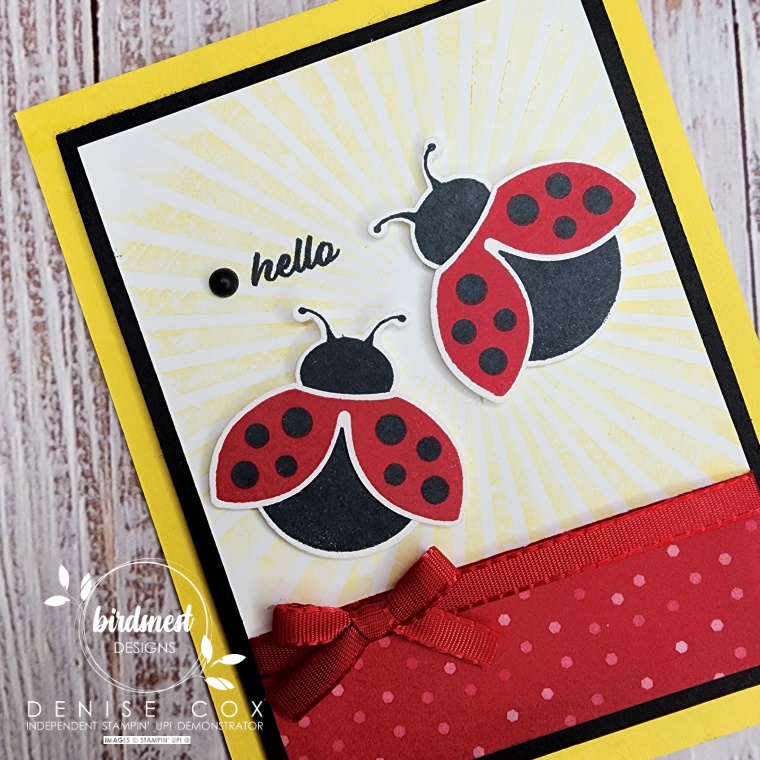
Hello Ladybug with Rays of Light Background

Let’s kick off this week with a bright and cheery Hello Ladybug card! This is one of the cards that I designed for my monthly Host Club. We get together once a month to make three fun cards and take turns being the host. The host for the month gets a Stampin’ Up! Host Rewards shopping spree. There are some openings in the club coming soon so watch for that if you’d like to join us!

I love how well the Hello Ladybug stamped images pair up with the Rays of Light background stamp. Instead of just stamping the background I created a softer look by using a simple technique and a Blending Brush. I also added in a little fun-fold to make this card extra special!
The instructions and measurements for today’s card are included in the Let’s Make It section of this post. If you keep scrolling to the end you’ll also see the supply list with clickable links to make your online Stampin’ Up! shopping super easy ❤️.
Thank you for stopping by, it was so nice to see you today!


Let’s Make the hello ladybug card!
- Cut a 10 x 3-3/4 Basic Black card base and score at 5″
- Fold the card base and then adhere the back of the card centered on a 4-1/4 x 5-1/2 piece of Daffodil Delight cardstock
- Attach a 3-1/2 x 4-3/4 Basic White cardstock piece to the inside of the Basic Black card
- Using a Blending Brush and Daffodil Delight ink brush some colour on to the Rays of Light Background stamp and then stamp on to a second 3-1/2 x 4-3/4 Basic White piece of cardstock
- With Tuxedo Black Memento ink stamp the ‘hello’ above and to the left of the center of the Rays of Light stamped image
- Glue a 3-1/2 x 1piece of Real Red Designer Series Paper along the bottom of the stamped piece
- Wrap the ribbon across the front directly above the DSP, adhere in place on the back, cut off the excess and set aside for a bow later
- Attach this Basic White finished piece to the front of the Basic Black card
- Tie a bow with the remaining ribbon and attach in place with a Mini Glue Dot
- On the remaining piece of Basic White cardstock stamp the ladybug body twice with Tuxedo Black Memento ink then stamp the wings twice with Real Red and the Dots in the wings with Tuxedo Black Memento ink – Be mindful that you will be using the Ladybug punch to cut the images out so leave enough room between ** you could also opt to punch first and then stamp on the pieces
- Glue the wings on to the ladybugs
- Attach the ladybugs to the card front using Stampin’ Dimensionals
- Add a single Black Matte Dot to the left of the stamped hello


Stampin’ Up! products I used on today’s card
You can purchase Stampin’ Up! products from my online store from anywhere in Canada. If you are currently looking for a Stampin’ Up! Demonstrator, I would love to have you shop with me! To see more details of any of the products in this list just click on the image below!
Earn customer loyalty tokens for each $10 increment of your online order … collect and redeem for free Stampin’ Up! product!! If you have any questions about ordering or need a little help to place your order please contact me … I am happy to help!
")


 Designer Series Paper")


Adorable combination!