Spruced Up: A Retro Joy Card

Welcome it is so nice to see you! Today I am continuing with my Spruced Up project share. This time I have a very different, kinda retro card to share with you. I went completely non-traditional colours and brought in lots of foil to create a really unique card to share with you.
I also used a few elements from the Santa Express Memories & More card pack … which if you haven’t checked out yet, you must! It is an absolutely fabulous collection of cards, stickers, wooden elements & printed window sheets – I wish that I had discovered it sooner ?. I’ll be live on my Facebook page tonight at 7:00pm (PST) for my weekly Tutorial Tuesday and have another card that features elements of this pack and of course, the Spruced Up bundle!
To learn how I have created today’s card scroll down to the “Let’s Make It” section and at the bottom of today’s post you will also see a list of all of the products I used. Each product has a link to make it easy for you to take a closer look at the products from my online store.
Thanks for stopping by today! Wishing you a wonderful day and Happy Stamping!!

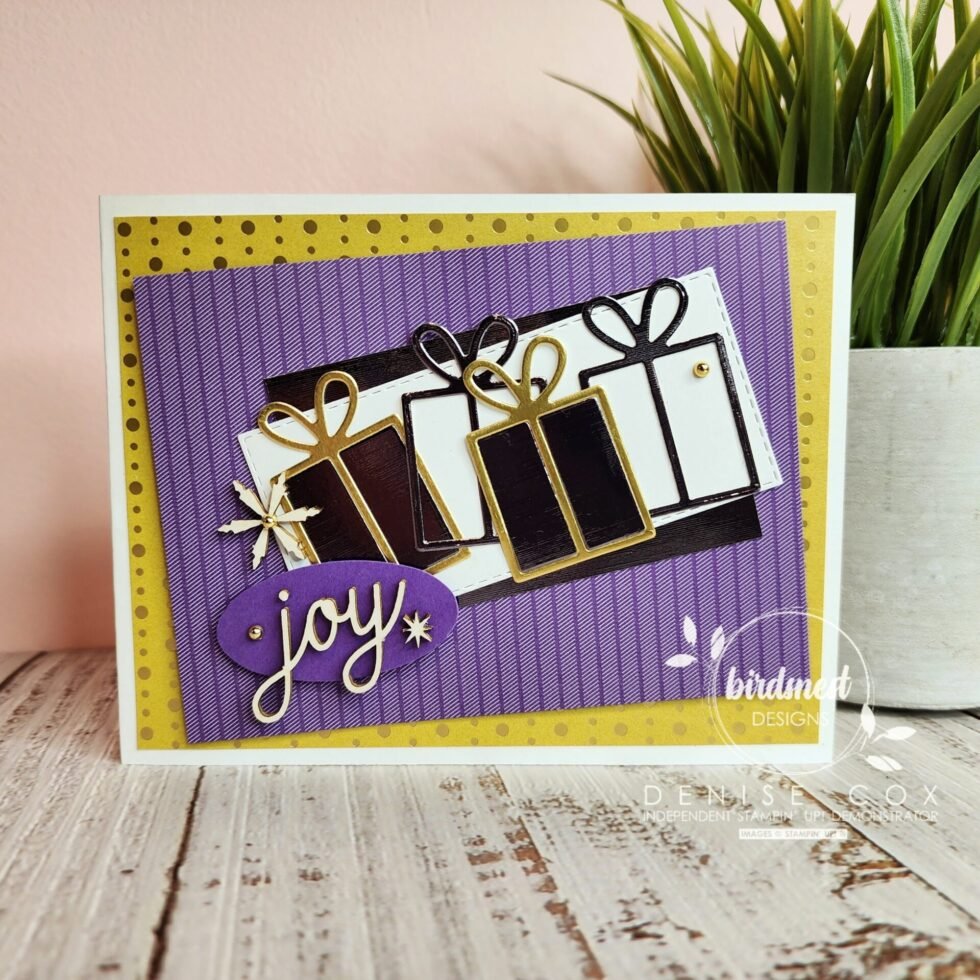
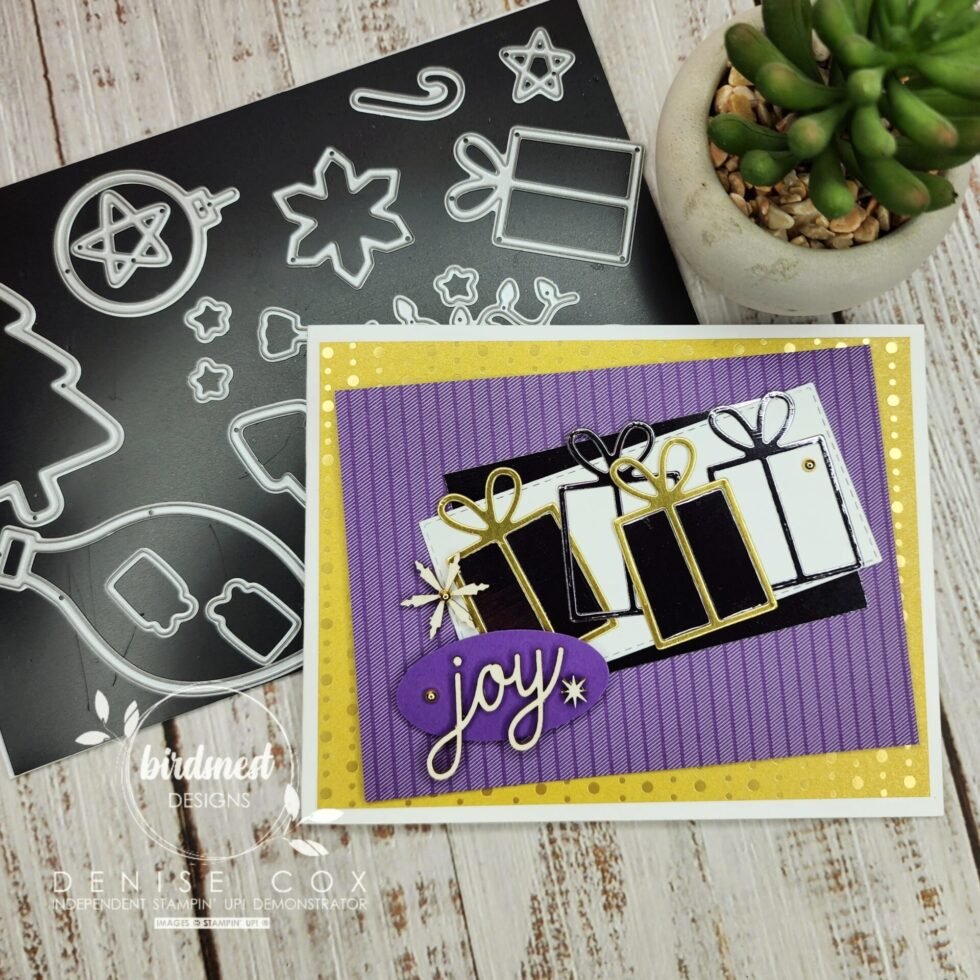
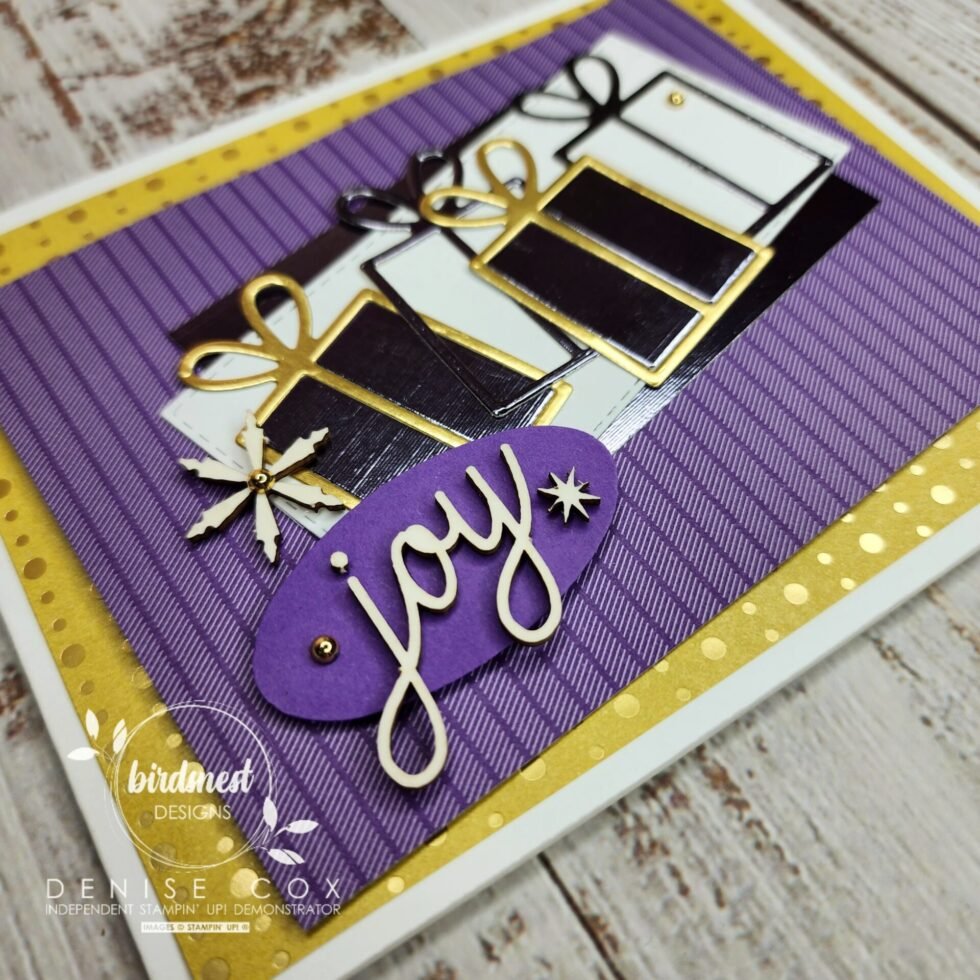
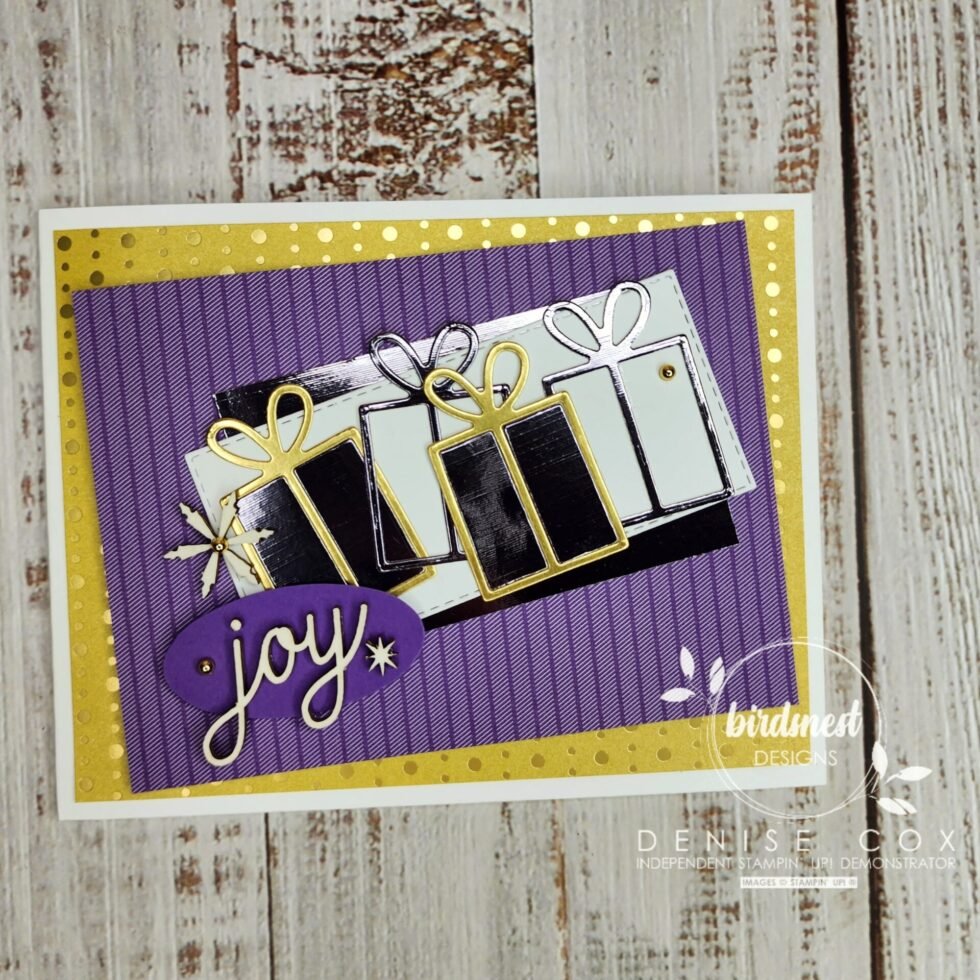
Let’s Make this Retro Spruced Up Joy Card!
- Cut a Thick Basic Whitecard base (11 x 4-1/4) then score in half (5-1/2) and fold to create your side fold card
- Add a panel of the Gold Festive Foils Specialty paper to the front of the card
- Cut a piece of Gorgeous Grape Designer Series Paper from the Brights Collection and adhere on a slight angle to the specialty paper
- Layer a Basic White stitched rectangle on to a piece of (dark, almost purple) Silver Foil paper, then attach to the card front
- Die cut 4 gifts from the Spruced Up Outlines dies – 2 from gold foil and 2 from the same colour silver foil used in the step above – adhere with multipurpose glue or adhesive sheets to the stitched rectangle
- Punch out a oval from the Double Oval punch out of Gorgeous Grape cardstock and adhere to the card using stampin’ dimensionals
- Attach the wooden snowflake, ‘joy’ and little star from the Santa Express Memories & More Card Pack to the card using multipurpose glue
- Add a few gold Festive Pearls for a little more sparkle and bling!
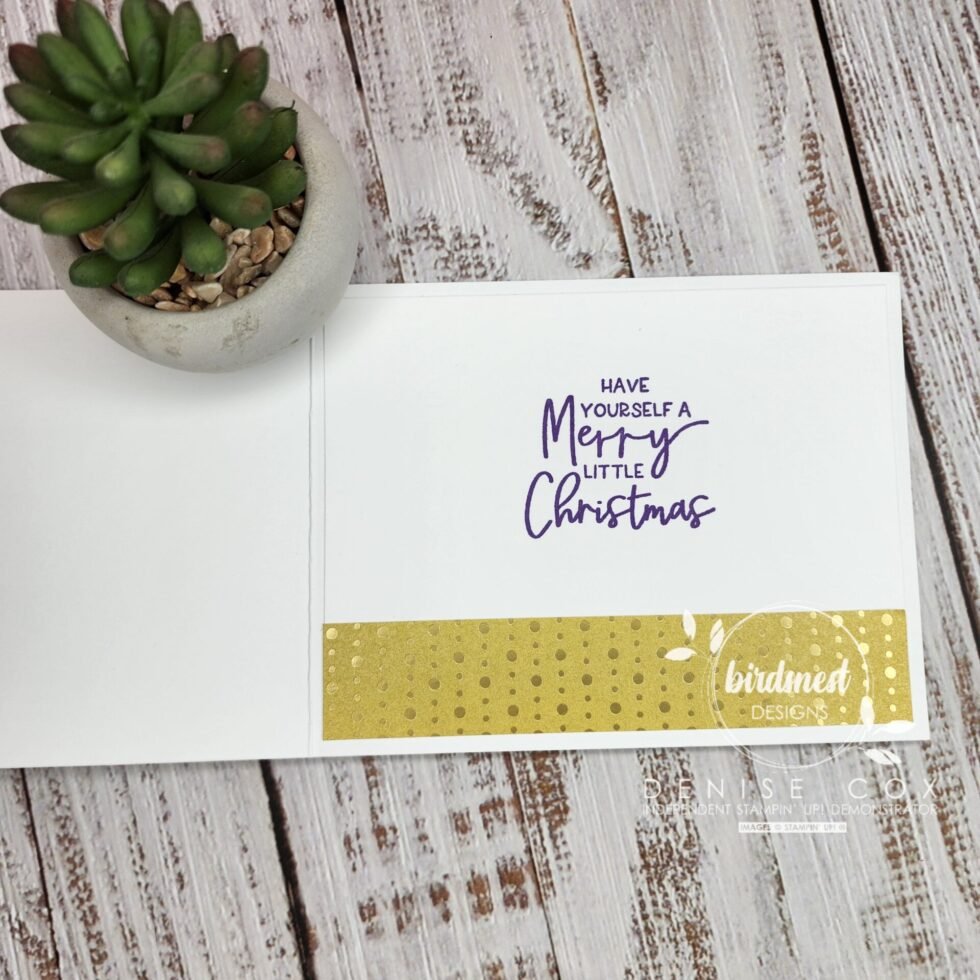
- Add some love to the inside of your card by stamping on a layer (4 x 5-1/4) of Basic White cardstock and attaching it inside… take a peek below to see how I decorated mine!
Stampin’ Up! goodies I used on today’s card
You can purchase Stampin’ Up! products from my online store from anywhere in Canada, I would love to have you shop with me! Click on any of the items below to see it in my online store ? If you have any questions about ordering or need a little help to place your order please contact me … I am happy to help!
")
 Specialty Designer Series Paper")


 Specialty Pack")
 Designer Series Paper")


