Clean & Simple Warm Welcome

Hello and happy snowy Monday! It’s time for a brand new product of the week … let me introduce you to the Warm Welcome bundle! This bundle is an online only bundle right now and will be in the upcoming January -April Mini Catalogue! This week I am going to demonstrate a few of the amazing features of this fun bundle and give some inspiration on how to pair it with other Stampin’ Up! products too!
This bundle is so fabulous that I have chosen the Warm Welcome stamp set to be the stamp for the December Stamp of the Month Club! If you want to learn more about this monthly club that I offer you can find all of the information by clicking right here.
To recreate this simple card I am sharing to day scroll down to the “Let’s Make It” section where I have all the steps for you. At the bottom of today’s post I have a list of all of the products that I have used. Each product has a link to make it easy for you to purchase the products from my online Stampin’ Up! store.
Thank you for coming by today … it was so nice to see you! Have a wonderful Monday and check back in tomorrow for more with the Warm Welcome bundle!


** Easily personalize your card by adding an address above the door using the cute little number dies in the Warm Welcome collection **
Let’s Make This Simple Warm Welcome Card!
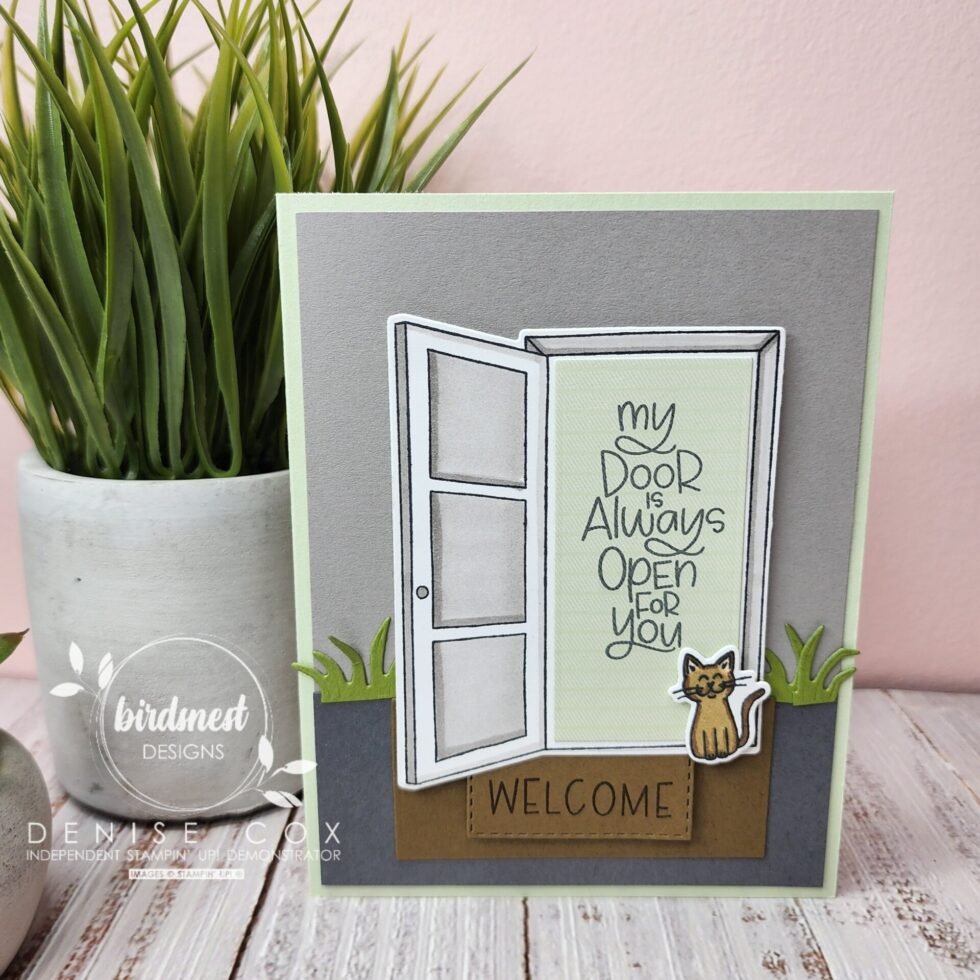
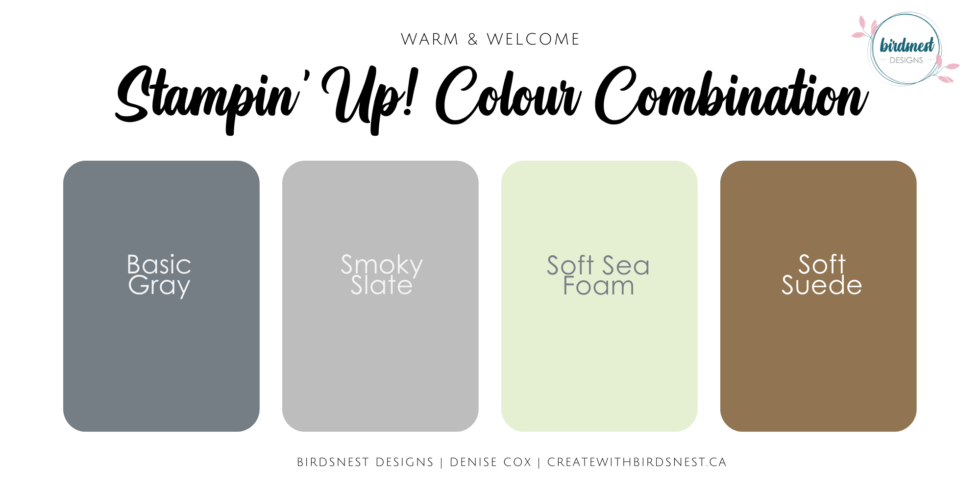
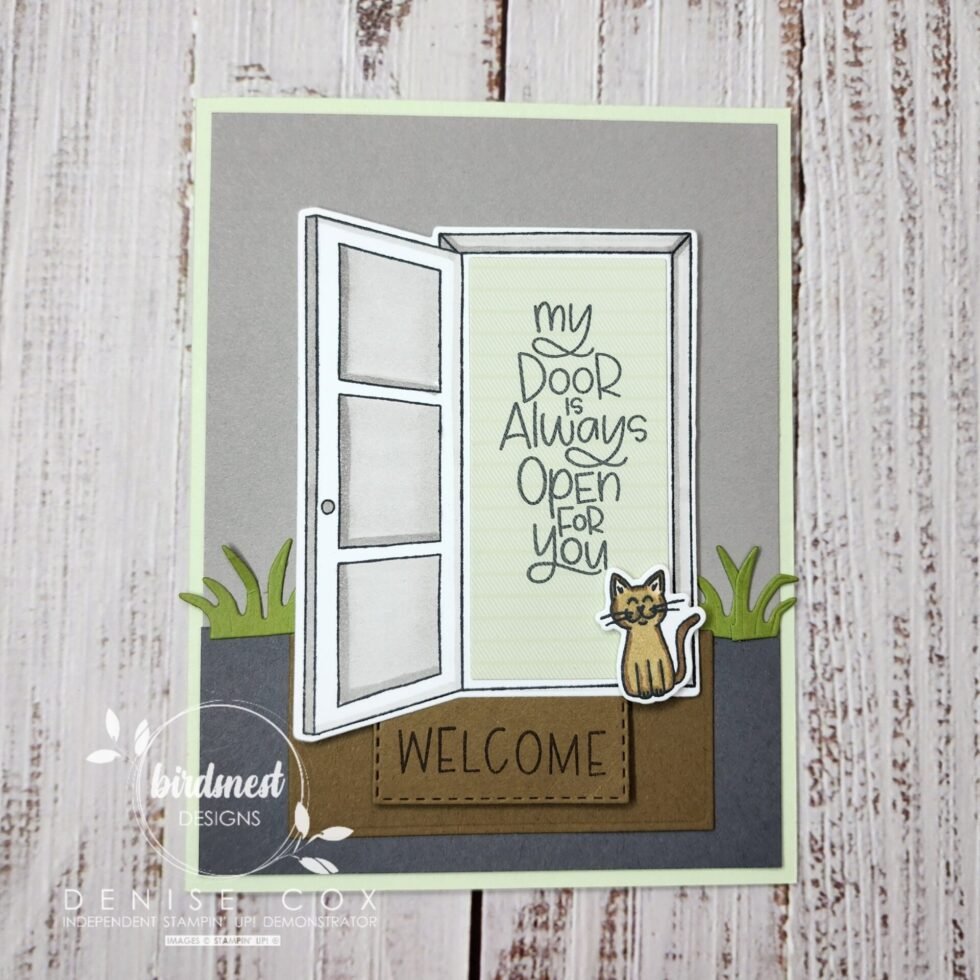
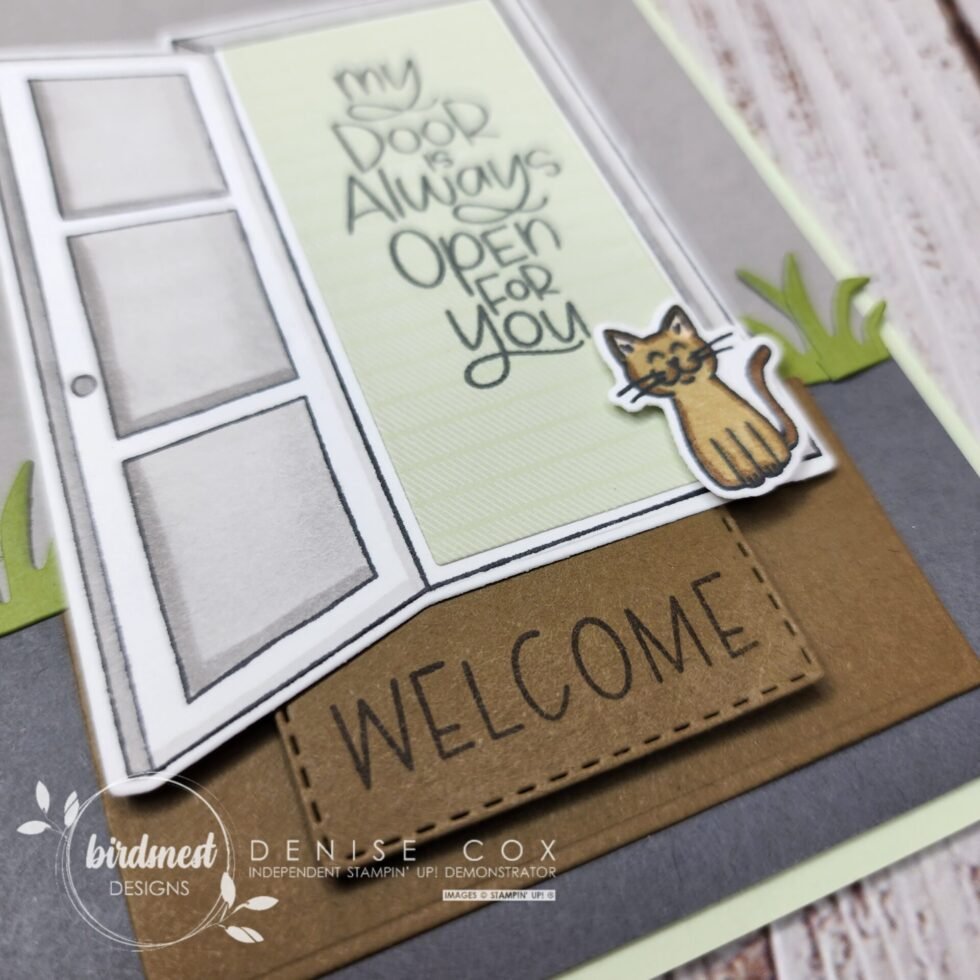
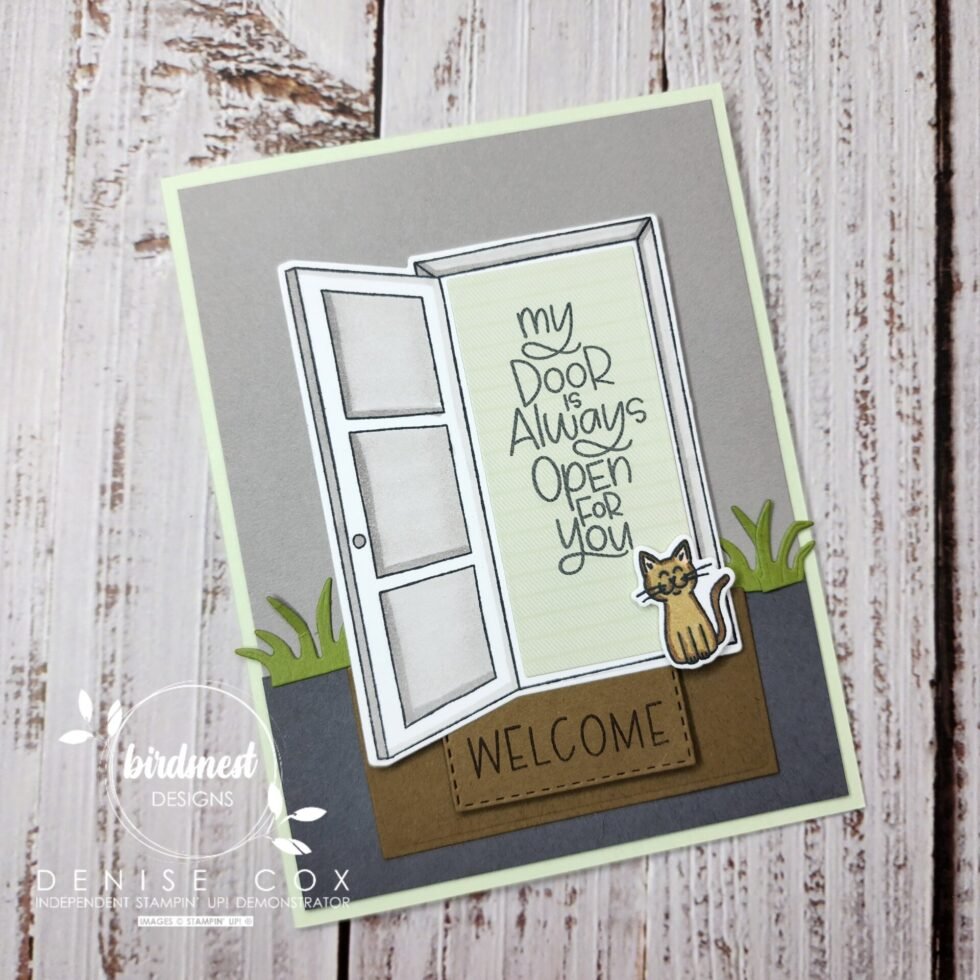
- Begin with a standard card base in Soft Sea Foam cardstock
- Add a panel of Smoky Slate cardstock to the front and a strip of Basic Gray cardstock along the bottom
- Stamp the lovely door image with Basic Gray ink onto a piece of Basic White paper and die cut using the Mini Stampin’ Cut & Emboss machine and the Warm Welcome dies
- Using the same set of dies cut one stitched rectangle and one plain rectangle from Soft Suede cardstock and a second plain rectangle from Soft Sea Foam Designer Series Paper
- Adhere the plain Soft Suede rectangle to the Basic Gray cardstock strip centered horizontally and flush to the top
- Colour the door panels and frame with Smoky Slate Stampin’ Blends and then attach to the center of the card front with Stampin’ Dimensionals
- Stamp the sentiment on to the Soft Sea Foam DSP with Basic Gray ink and then adhere to the door cut out
- Stamp ‘Welcome’ on to the stitched rectangle cut out with Soft Suede ink and adhere tucked just beneath the door with stampin’ dimensionals
- Die cut two tufts of grass from Pear Pizzazz cardstock using the Elephant dies and adhere to each side of the door
- Stamp the cat from the Warm Welcome stamp set with Tuxedo Black Memento ink onto a scrap piece of Basic White paper, die cut and colour with Soft Suede Stampin’ Blends – attach to right of door with dimensionals
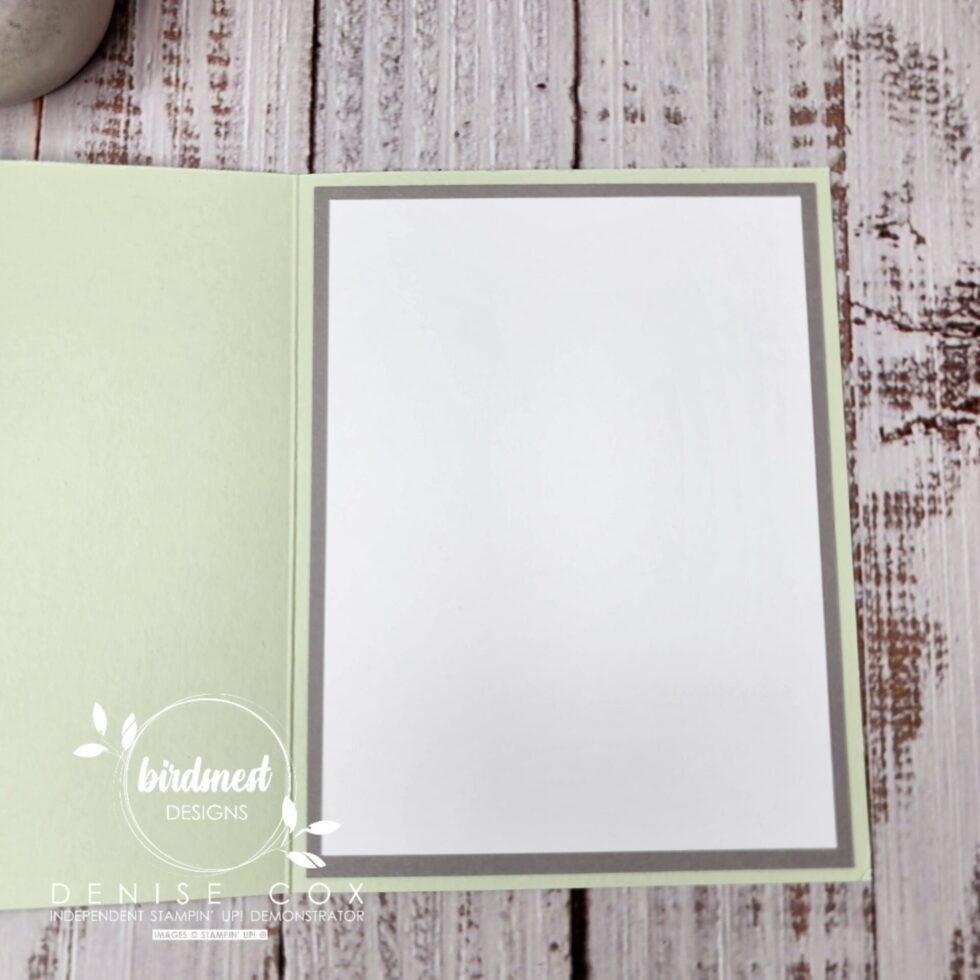
- For the inside of today’s card I simply layered Basic White and Smoky Slate cardstock together and left lots of room for a handwritten welcome note!
Stampin’ Up! goodies I used on today’s card
You can purchase Stampin’ Up! products from my online store from anywhere in Canada, I would love to have you shop with me! Click on any of the items below to see it in my online store ? If you have any questions about ordering or need a little help to place your order please contact me … I am happy to help!
")


