
Hello and Happy Friday! For the last post of the week I have a quick & simple birthday card to share with you. I created this simple card using the Stampin’ Up! Ready To Ride Designer Series Paper and Legendary Ride bundle. If you are loving the cards that I have shared with you this week then please remember to order your Ready To Ride Designer Series Paper now, before it is gone for good. It is currently on sale and part of the the Last Chance list to be retiring soon.
I have really enjoyed creating with the Ready To Ride Suite Collection this week and sharing the projects with you. It’s a unique set that can be used in so many ways.
I have provided the instructions and measurements for today’s card in the Let’s Make It section of today’s post. Keep scrolling to the end of the post and you will see a complete image supply list for the products I used on today’s card.
Thanks for popping in, have a wonderful week and Happy Stamping!

Let’s Make the ready to ride birthday card!
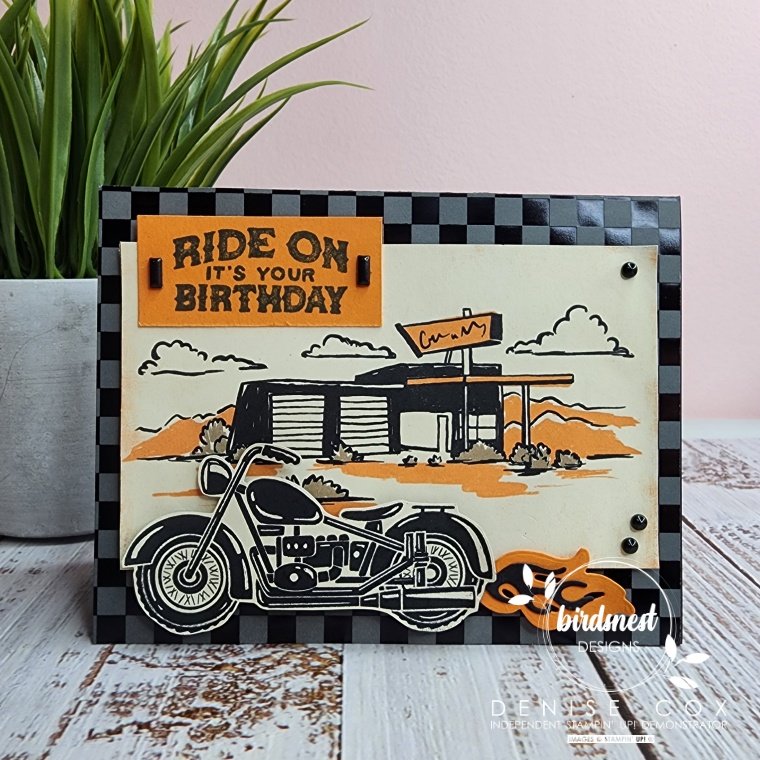
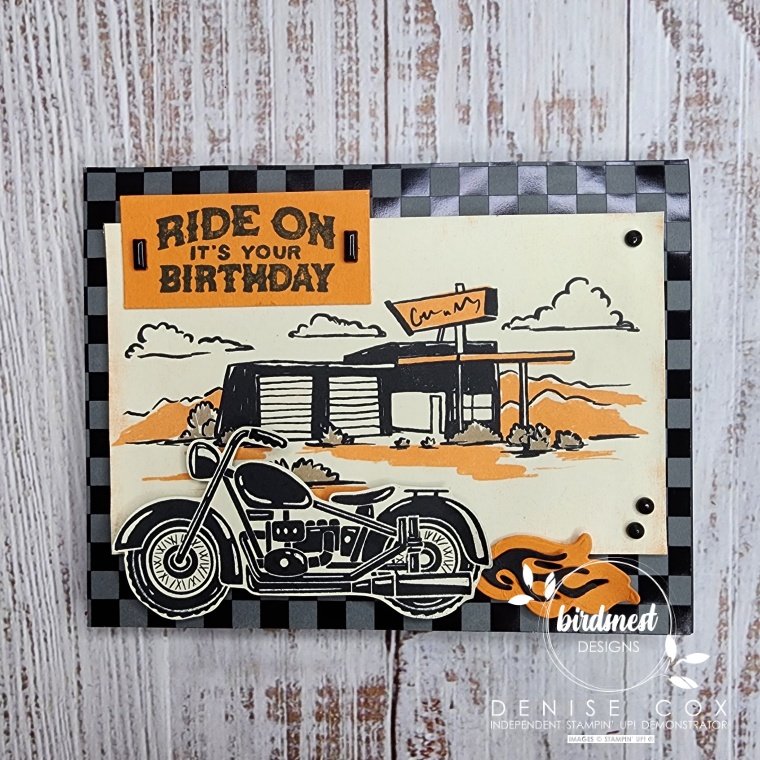
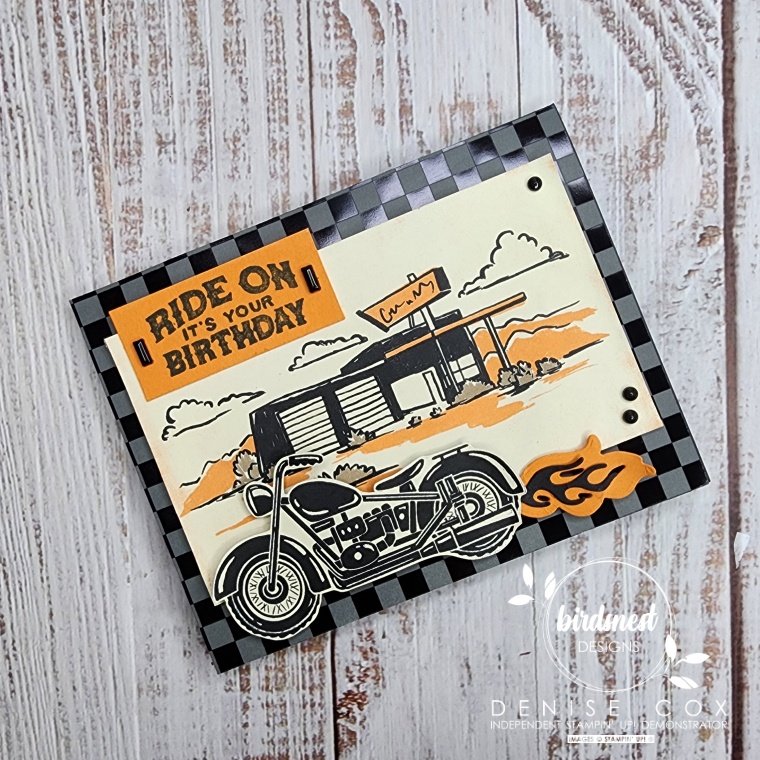
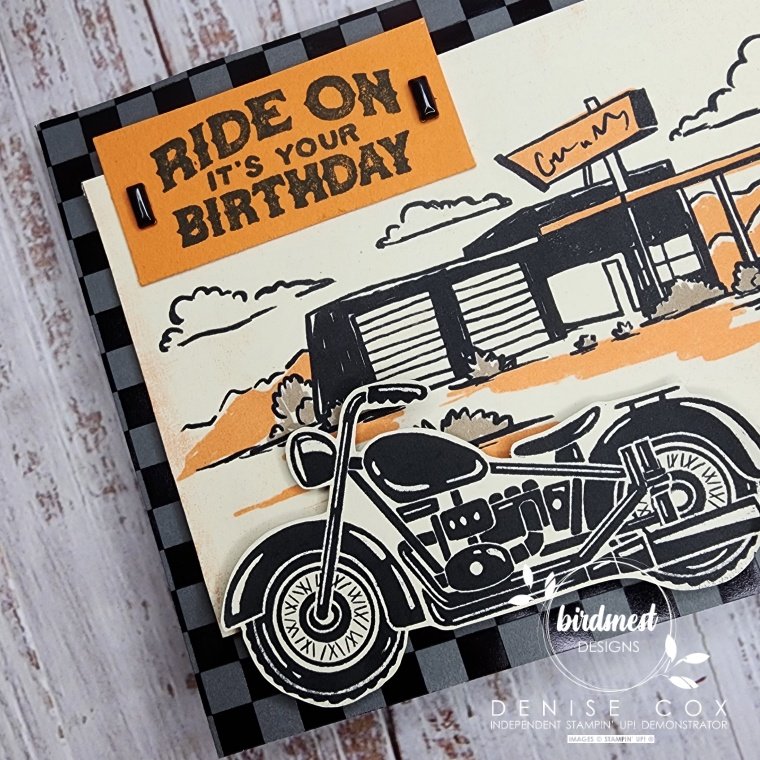
- Start with a Basic Black card base 8-1/2 x 5-1/2 scored in half at 4-1/4
- Cut a 4-1/4 x 5-1/2 piece of checkered pattern paper from the Ready To Ride Designer Series Paper (DSP) collection and adhere to the front of the card base
- Cut the 5 x 3 garage image card from the Ready To Ride DSP and adhere to the center of the card front using Black Stampin’ Dimensionals
- Cut a 2-1/4 x 1 piece of Pumpkin Pie cardstock and stamp the birthday sentiment from the Legendary Ride stamp set on it with Tuxedo Black Memento ink
- Adhere the sentiment piece to the top left of the garage image card as shown in the photos
- Using your Paper Snips or Legendary Ride dies, cut out one of the motorcycle images from the Ready To Ride Designer Series Paper then adhere to the card using Black Stampin’ Dimensionals
- Using scrap pieces of Pumpkin Pie and Basic Black cardstock cut the two flame dies from the Legendary Ride die set and layer them together
- Using Black Stampin’ Dimensionals, attach the flames tucked in behind the bike to make them appear to be coming out of the exhaust pipe
- To complete the front of the card add a few of the rectangle and circle Adhesive Backed Studs to the Pumpkin Pie sentiment and the left corners of the garage image
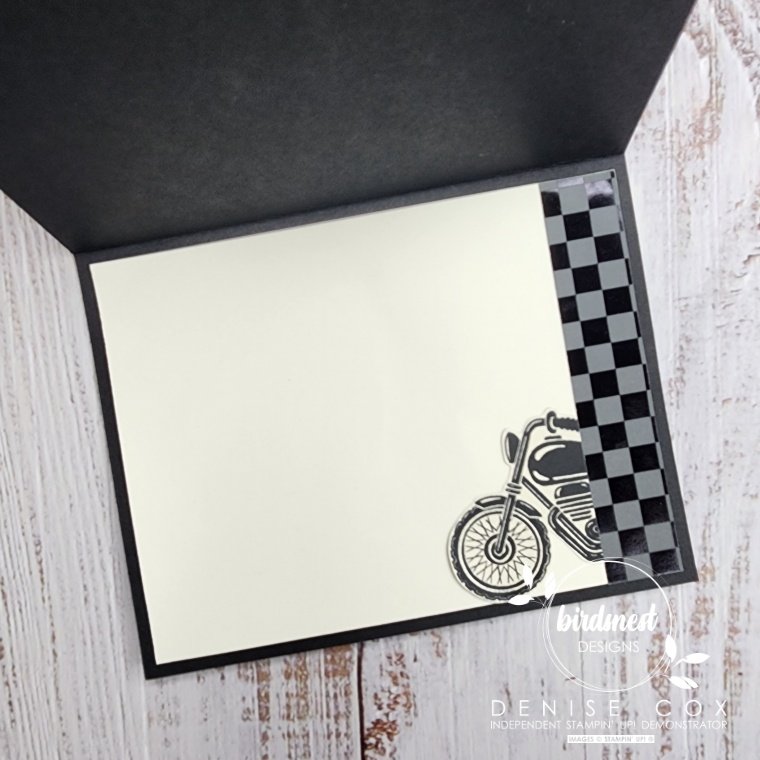
- Remember to spruce up the 4 x 5-1/4 Basic White insert for the inside of the card too! The photo below shows how I stamped the inside of my sample card to make this an awesome birthday card!
Stampin’ Up! products I used on today’s card
You can purchase Stampin’ Up! products from my online store from anywhere in Canada. If you are currently looking for a Stampin’ Up! Demonstrator, I would love to have you shop with me! To see more details of any of the products in this list just click on the image below!
Earn customer loyalty tokens for each $10 increment of your online order … collect and redeem for free Stampin’ Up! product of your choice!! If you have any questions about ordering or need a little help to place your order please contact me … I am happy to help!
")
 Specialty Designer Series Paper")


So dang adorable!